Replacing the Rear Camera on My Tiffin Open Road 29NA with a Furrion Vision S

One of the things I wanted to fix on our 2026 Tiffin Allegro Open Road 29NA was the rear camera.

The OEM camera was unreliable. Both the dealership and the Tiffin service center tried to fix it, but neither was able to make it reliable. Even when it worked, I wasn’t particularly happy with the image quality or the position of the camera.

There was another problem that was just as important to me. The OEM camera shared a display with the navigation system, entertainment system, and the other cameras on the coach. When we’re flat towing our Jeep, I want to be able to look up at any time and see the Jeep and the traffic behind it. I wanted the equivalent of a rearview mirror, not another selectable camera on a shared display.

My solution was to install a Furrion Vision S as a completely independent observation camera system with its own dedicated monitor.

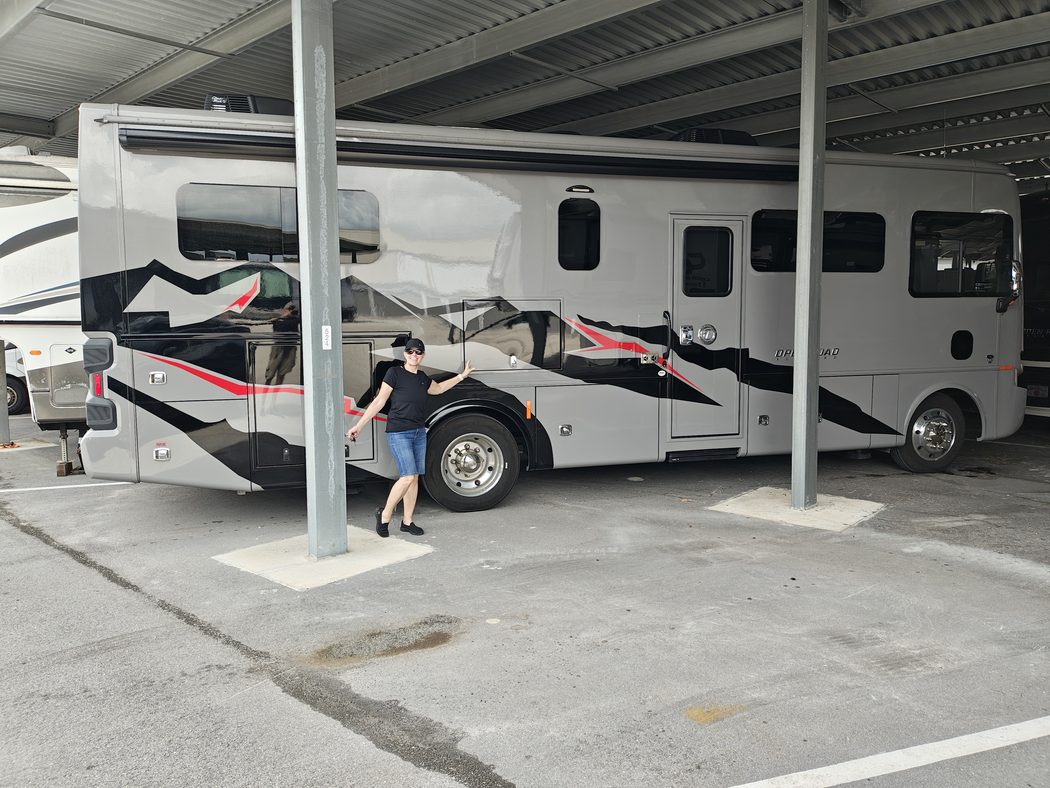
Our 2026 Tiffin Allegro Open Road 29NA motorhome
This is our motor home.

Challenge

I initially spent time trying to get the OEM camera working correctly and also investigated whether I could reuse its wiring for the Furrion.

In retrospect, I wouldn’t do either again.

The OEM wiring was potentially part of the original problem, and it didn’t provide the simple, direct power source I needed for the Furrion. Rather than continuing to troubleshoot a system I already didn’t trust, I decided to bypass it.

I did, however, reuse the existing hole from the OEM camera. That gave me a good location for the Furrion without drilling another camera hole into the rear of the coach.

Directly above the camera is the center upper marker light.

That turned out to be the key to the installation.

Rear of the Tiffin showing the camera location and center upper marker light
Rear of the coach showing the camera location and center marker light directly above it.

Solution

Getting Power to the Camera

I removed the center marker light and determined that I could use its running-light circuit to power the Furrion.

To get the new power wire from the marker-light opening down to the camera opening, I used a stiff piece of non-electrical wire and fashioned a hook on the end. I used that to snag and pull the new wire between the two openings.

It was simple and saved me from having to open anything else up.

Center upper marker light removed with the running-light wiring exposed
The center marker light removed while I worked with the running-light circuit.

I made the electrical connections using heat-shrink crimp connectors to help protect them from moisture.

There is one consequence of powering the camera this way: the coach’s running lights have to be on for the Furrion camera to operate.

I’m perfectly happy with that. When I’m driving and want the observation camera, I simply have the running lights on. But it’s important to know if you’re considering doing the same thing.

At this point, I thought I was basically finished.

I wasn’t.

The 11.4-Volt Problem

The camera worked perfectly while the coach was sitting with the engine off.

Then I started the engine.

The camera shut itself off.

That was an interesting problem because nothing had changed with the camera itself. It worked with the engine off and stopped working with the engine running.

So I got out the multimeter.

I measured the voltage on the circuit with the engine off and then measured it again with the engine running. With the engine running, the voltage at the camera dropped to approximately 11.4 volts.

That was low enough that the Furrion would shut itself down.

Multimeter used while testing voltage on the marker-light camera power circuit
Testing the marker-light circuit with a multimeter helped isolate the voltage problem.

That testing was important because it isolated the problem. I wasn’t dealing with another bad camera, a wireless connection problem, or something mysterious in the Furrion system. The camera simply wasn’t getting sufficient voltage under the conditions in which I actually needed to use it.

Now I needed a way to provide the camera with a stable 12-volt supply.

Adding the DROK Regulator

My first thought was to find something small enough to fit inside the camera housing. That would have made for the cleanest installation.

I couldn’t find a suitable solution that was small enough.

Instead, I found a DROK weatherproof DC voltage regulator that accepts a 9–36V input and provides a regulated 12V output.

Because it is a small weatherproof black box, I could mount it externally. I installed it immediately below the Furrion camera.

Weatherproof DROK DC to DC voltage regulator used to provide regulated 12-volt power
The weatherproof DROK DC/DC regulator I used to provide a stable 12-volt supply.
Furrion Vision S camera and DROK voltage regulator assembled before installation
The Furrion camera and DROK regulator assembled before installation.
Finished Furrion Vision S rear camera installation on the Tiffin
The finished camera installation on the rear of the coach.

The power arrangement was now straightforward: power comes from the center marker/running-light circuit, passes through the DROK regulator, and then supplies the Furrion camera with regulated 12V power.

I tested the system again under the condition that had caused the original failure: with the engine running.

This time the camera stayed on.

That solved the problem.

Mounting the Monitor

I wanted the monitor in a position that felt natural while driving. I didn’t want it sitting on the dashboard or attached to the windshield.

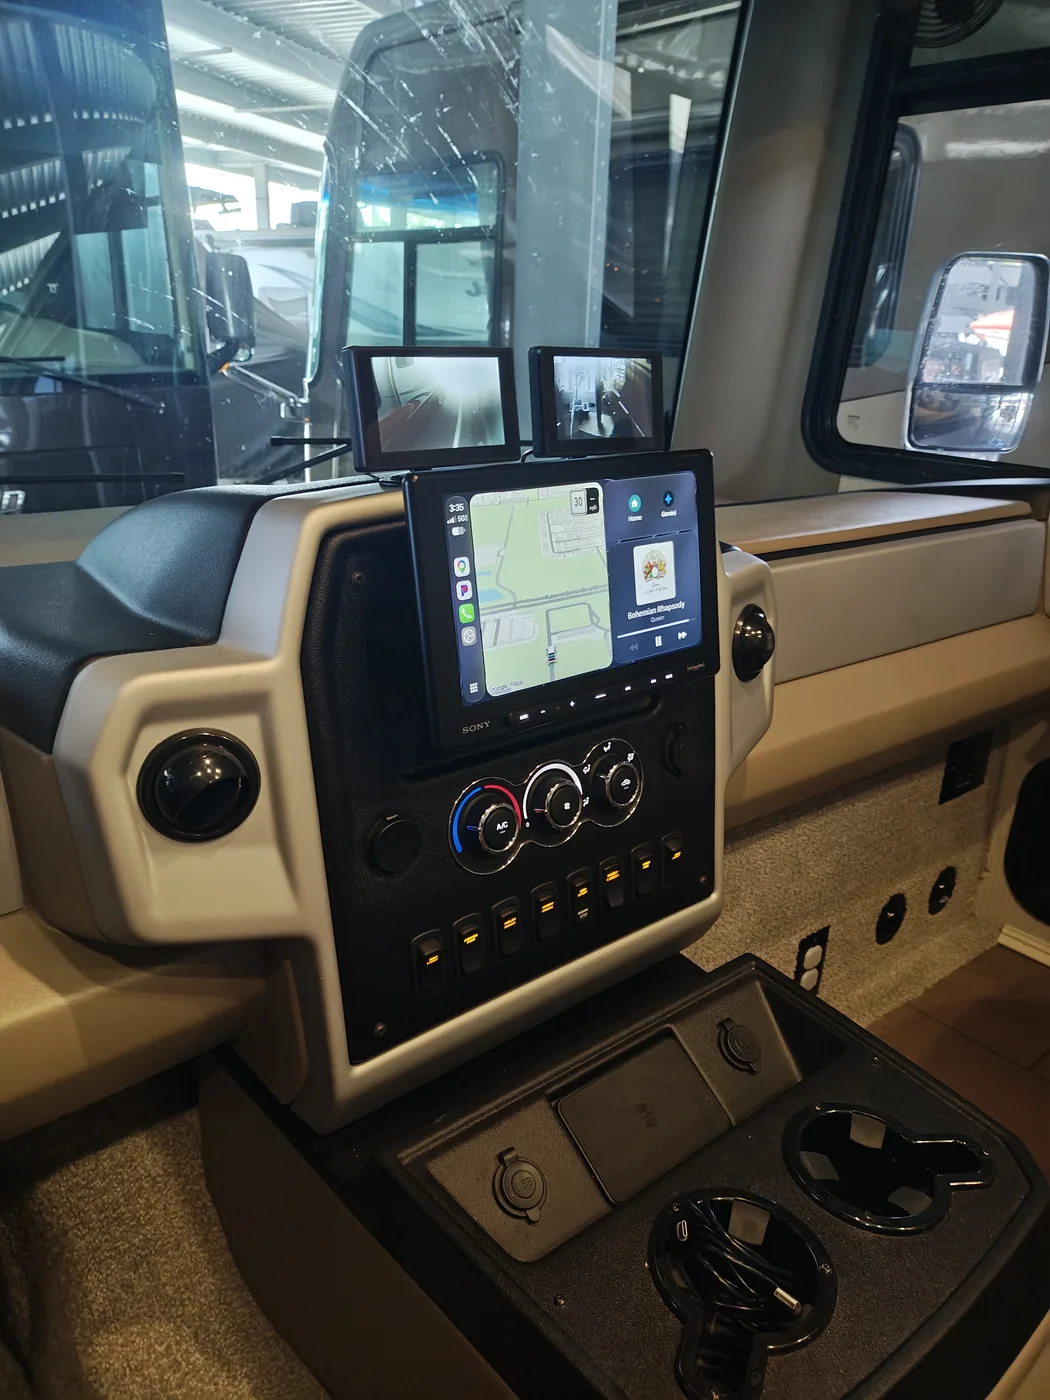
Our 29NA has the cabinet above and between the pilot and copilot where Tiffin offers an optional front television. I had removed that TV, which gave me a convenient way to route the wiring for the Furrion monitor.

For the mount itself, I reused the tabletop/dash mount that came with the Furrion monitor.

I drilled mounting holes in the Furrion stand, flipped it upside down, and bolted it directly to the underside of the empty TV cabinet. I used stainless-steel bolts, washers, and locknuts.

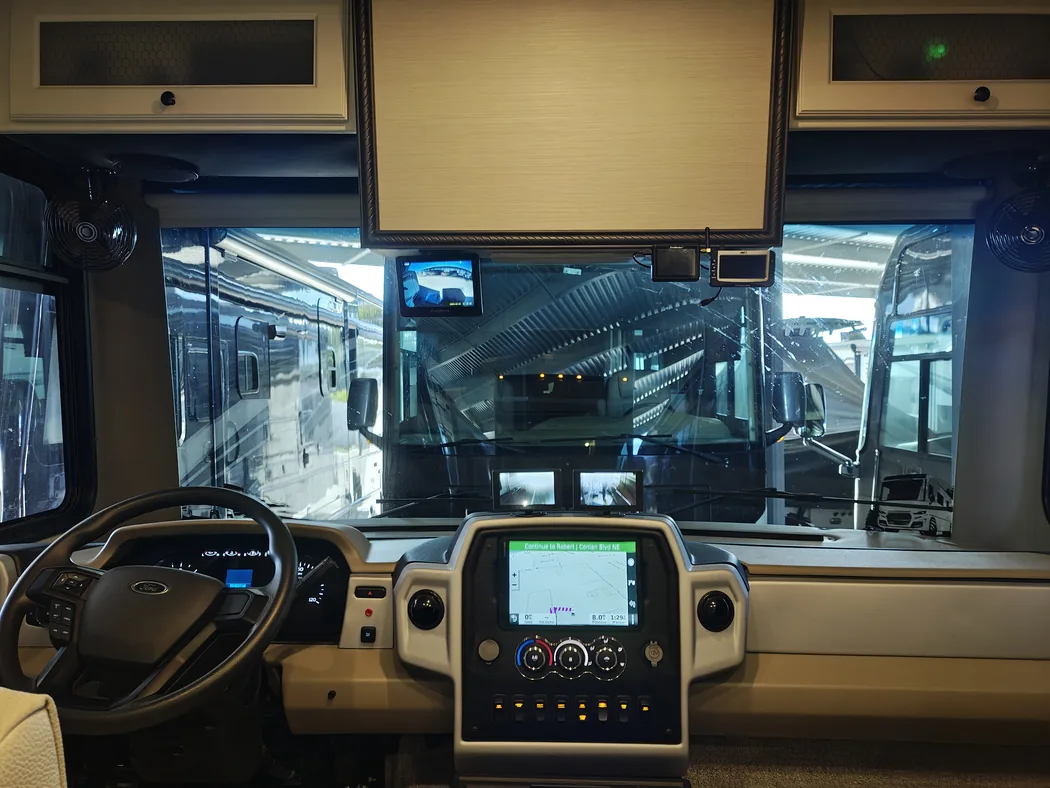
The result puts the monitor almost exactly where a rearview mirror would naturally be in a car.

For the power cable, I drilled a 1/2-inch hole through the underside of the cabinet.

I happened to have a bag of assorted rubber grommets in my garage, and one fit the hole perfectly. I installed the grommet so the power cable passes through rubber instead of rubbing against the raw edge of the drilled hole.

The cable runs through the cabinet to a plug in the upper-left cabinet.

An advantage of doing it this way is that I can simply unplug the monitor if I ever want to remove it.

Furrion Vision S monitor mounted beneath the front television cabinet
The finished monitor installation beneath the front TV cabinet.

Outcome

The result has been better than I expected.

The image is extremely clear, and the camera gives me exactly the view I wanted. I can see the entire Jeep while we’re towing it, as well as vehicles approaching from behind.

The position of the monitor is also nearly perfect. Looking at it feels natural—very much like glancing at the rearview mirror in a car.

Driver's view of the Furrion monitor mounted above the windshield
Ready to roll. The monitor sits naturally in my line of sight much like a rearview mirror.

Most importantly, the system has proven itself on the road.

We’ve driven approximately 3,000 miles with this installation, including some particularly rough roads in South Carolina. The wireless connection has been 100% stable. I’ve had no problems with the camera, the monitor mount, or the DROK installation.

There is one characteristic of the Furrion image that took some getting used to: objects are considerably closer than they appear on the monitor.

After driving with it for a while, I’ve adjusted to that. I don’t use the monitor to judge precise following distances anyway. Its primary purpose is situational awareness: I can see the Jeep, see what’s happening around it, and see vehicles approaching from behind.

For that purpose, it works extremely well.

What I’d Do Differently

There are a few things I’d change if I did the project again.

First, I wouldn’t spend time trying to fix the OEM camera. The dealership and Tiffin had already tried, and I ultimately replaced it anyway.

I also wouldn’t spend time investigating whether I could reuse the OEM camera wiring. Building an independent system with its own power source turned out to be the better solution.

Second, I’d be a little more careful during the wiring. I forgot to heat-shrink one of my connections before reinstalling the marker light, which meant I had to take the marker light off a second time to finish the job properly. That was entirely avoidable.

Finally, I used silicone to seal around the camera and marker light. It has worked, but I think there are probably better sealing products for this application. If I were doing the installation again, I’d investigate the alternatives before automatically reaching for silicone.

Other than those things, I wouldn’t change the design.

I wouldn’t change the camera location.

I wouldn’t change the monitor location.

I wouldn’t change the basic approach of powering the camera from the center marker/running-light circuit and using a regulator to provide stable 12V power.

And after 3,000 miles—including some pretty rough roads—I certainly wouldn’t change the Furrion system based on its performance.

The project started because I was tired of an unreliable OEM camera. What I ended up with is considerably better than simply repairing it would have been: a dedicated observation camera that functions much more like the rearview mirror I wanted in the first place.

I’m Back!!

I’m not sure who might be paying attention to this, but I used to spend lots of time blogging about hiking equipment, camper maintenance, and anything else that I though was interesting. My last post was a book review on January 1, 2022. That means I have been absent for 4.5 years. What can I say? I was super busy running a company. So much has happened. In that time I now have 4 grandchildren (all boys!) and, sadly, my mom died (she is buried at hope mausoleum in New Orleans). This is not the same world it was for me in 2022. 

Now I am about to turn the page on my career and get back to independent technical consulting. You can see my site here if you are interested in what I am going to be doing: https://tony.galluscio.com. I’m also picking up some of my interests back up like hiking, attempting to play the guitar, and trying to learn Spanish. 

As a result, I thought this would also be a great time to pick my blog back up. I am going to start blogging about RV projects and hiking again!!

Stay tuned!

Book Review: Beneath the Veil of Smoke and Ash

Beneath the Veil of Smoke and Ash: A Novel by [Tammy Pasterick]Overview:

This is my first ever book review. You can see my other posts here.   This post kicks things off with a fantastic read, Beneath the Veil of Smoke and Ash: A Novel by Tammy Pasterick.  Normally, I discard books that do not get my interest quickly.  I have many partially read books on my Kindle. I tend to cut my losses and discard any book that does not interest me. That is definitely not the case with Tammy Pasterick’s first novel. This was  an engaging read from the start. 

Category:

I think this book falls into the category of historical fiction. As such, this novel gives the feel of being meticulously researched and really gave me the feel of what it would be like to live in the early 1900s near Pittsburgh Pennsylvania. I felt transported back in time and my attention was kept there through a powerful story and engaging characters. The characters are real people just like people today, but in a different time and place.

Characters:

I love the way the Tammy Pasterik  teaches you about the characters so that you become familiar with them.  That makes this novel easy to read and absorb. The novel is divided into relatively short chapters, where each chapter focuses on one of the main characters and tells the story from their perspective. 

Ending:

I like an ending that resolves major story lines in a realistic. though somewhat unexpected way. This novel does not disappoint. While I would love to read more about the Kovac family, I did not feel betrayed by the ending. I felt like the end made sense, and I can move on to a new book. 

Summary:

I give this book my highest recommendation for this book review.  I look forward to reading future books by Tammy Pasterick. You can purchase this book here.


2020 Annual Camper Maintenance

2020 Camper Maintenance

Due to the pandemic our camper sat unused for 8 months so I decided to do the camper maintenance a bit early on my own this year. Bobby normally helps me with this but he is a Respiratory Therapist working in Gainesville, FL. So, I performed the required maintenance on our 2015 Jayco Jay Flight 23RB Travel Trailer to for a trip to Paynes Prairie to help our two younger, Stevie and Charlie, move into their new place to start the new academic year at University of Florida. I somewhat followed the same list as previous years.

Here are some stats on our camper as of July 18, 2020 when the maintenance was performed.:

  • Years Owned: 5 years, 2 months
  • Total Mileage: 17133 miles
  • Total Nights Camping: 166 Nights Camping

For the record, here is a list of all of the systems on which we performed preventative maintenance:

System Tasks Notes

Hitch

Configured backup assist N/A. In my opinion this is a complete waste.
Removed Gear Rust N/A
Lubricated ball and sway connectors Used standard grease.

Propane

 Inspect  Hoses, connectors, and tanks in good repair
 Clean  N/A
 Refill  Refilled before previous trip was canceled

Undercarriage

Inspect Noticed even more rust. Still need to plan some time to work on this.

Roof

Inspect Seams Last year we repaired with Eternabond tape and it is holding nicely.
Repair issues Broke one skylight while cleaning the roof. Had to replace and sealed with eternabond.

Stabilizers

Inspect Replaced with removable 7500 lb stabilizer jacks that we keep inside the house (rather than letting them rust on the camper).
Lubricate N/A. New stabilizers

Steps

Paint N/A. Painted earlier in year.
 Lubricate hinges Lubricated earlier in year

Fresh Water

 Sanitize  Followed recommended procedure to drain, sanitized, flush, and refill the fresh water system. I should write a separate blog detailing that process.

Septic system

Clean tank Tank has been kept very clean over the last year so no action necessary.
Sanitize gear Gear was kept clean over the last year so no action was necessary.

Hot Water (Gas)

Test striker Lit and ran hot water heater on gas. Removed wasp nests
Clean Cleaned using vacuum and compressed air

Refrigerator (Gas/Electric)

Test striker Lit and ran refrigerator on gas. Cleaned out wasp nests. Ran until cold on both gas and electric.
Clean Cleaned using vacuum and compressed air

Stove (Gas)

Test striker Lit and ran stove on gas

Air Conditioner

Inpect and Clean filter Internal parts are starting to rust. Unit is not running as efficiently. Added an additional window AC unit that we can use as necessary during really hot months.

Awning

Clean Sprayed with bleach water to kill mildew. Actually cleaned up nicely
Inspect Some rust on screw heads, etc.
Lubricate Sprayed liberally all joints and moving parts with silicone lubricant.

Wheels

Inspect New tires this year. Inspected rubber, hubs, and suspension. No issues.
Grease hubs N/A. Will do this next year.
TPMS Replaced batteries in the tire pressure monitoring system (TPMS)

2019 Annual Camper Maintenance

2019 Camper Maintenance

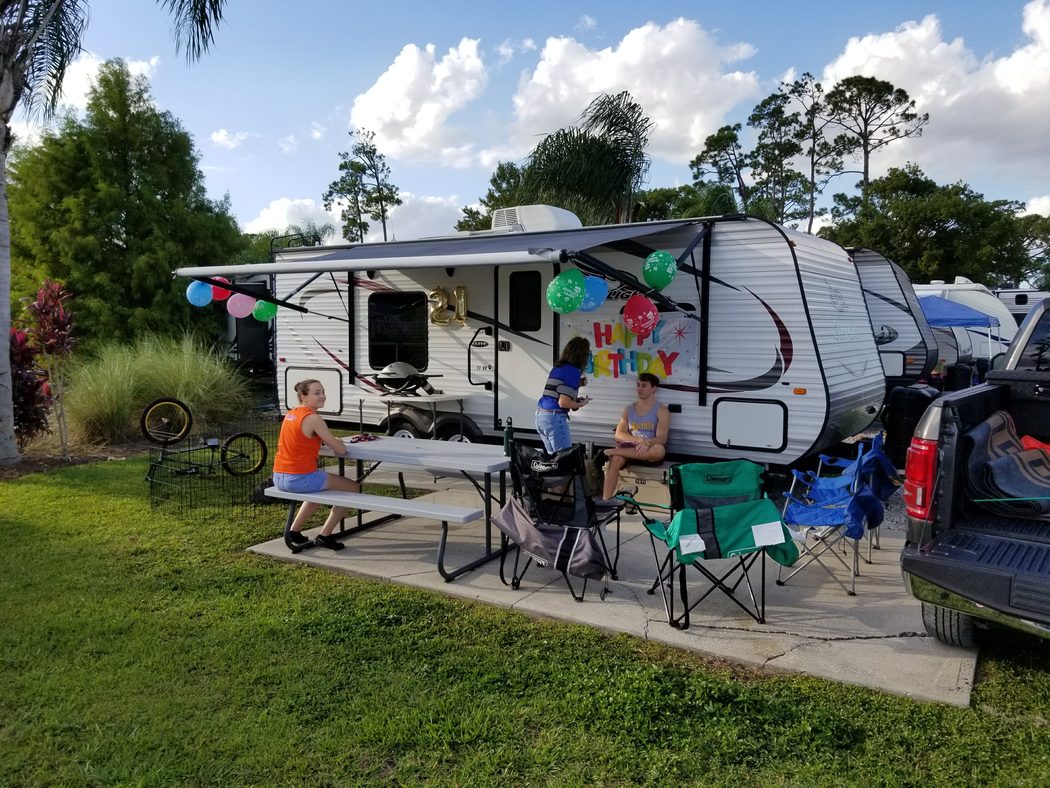
My son, Bobby, came home October 10-11 2019 to help me do the required maintenance on our 2015 Jayco Jay Flight 23RB Travel Trailer for a celebration we had in Orlando for my son, Stevie’s, 21st birthday. This year we were a bit late doing the maintenance, but better late than never. We basically followed the same list that we created last year.

Here are some stats on our camper:

  • Years Owned: 4 years
  • Total Mileage: 15168 miles
  • Total Nights Camping: 161 Nights Camping

For the record, here is a list of all of the systems on which we performed preventative maintenance:

System Tasks Notes

Hitch

Configured backup assist N/A. In my opinion this is a complete waste.
Removed Gear Rust Sprayed with PB Blaster
Lubricated ball and sway connectors Used standard grease.

Propane

 Inspect  Hoses, connectors, and tanks in good repair
 Clean  N/A
 Refill  N/A. Need to fill before trip.

Undercarriage

 Inspect  Noticed even more rust. Need to plan some time to work on this.

Roof

 Inspect Seams  Last year we repaired with Eternabond tape and it is holding nicely.
 Repair issues  N/A. Eternabond done.

Stabilizers

 Inspect  Significant rust. Considering replacing when these become unserviceable.
 Lubricate  Sprayed liberally with PB Blaster.

Steps

Paint  N/A. Did not paint steps.
 Lubricate hinges  Sprayed hinges with PB Blaster.

Fresh Water

 Sanitize  Followed recommended procedure to drain, sanitized, flush, and refill the fresh water system. I may write a separate blog detailing that process.

Septic system

Clean tank Tank has been kept very clean over the last year so no action necessary.
Sanitize gear Gear was kept clean over the last year so no action was necessary.

Hot Water (Gas)

Test striker Lit and ran hot water heater on gas. Removed wasp nests
Clean Cleaned using vacuum and compressed air

Refrigerator (Gas)

Test striker Lit and ran refrigerator on gas. Cleaned out wasp nests
Clean Cleaned using vacuum and compressed air

Stove (Gas)

Test striker Lit and ran stove on gas

Air Conditioner

Inpect and Clean filter Internal parts are starting to rust. Unit is not running as efficiently.

Awning

Clean Sprayed with LA’s Totally Awesome to kill mildew
Inspect Some rust on screw heads, etc.
Lubricate Sprayed liberally all joints and moving parts with silicone lubricant.

Wheels

Inspect Inspected rubber, hubs, and suspension. No issues.
Grease hubs Dexter EZ-Lube hubs were easy to re-grease by following instructions on YouTube.

2018 Annual Camper Maintenance

Bobby Camper Maintenance

Anthony Galluscio Camper Maintenance

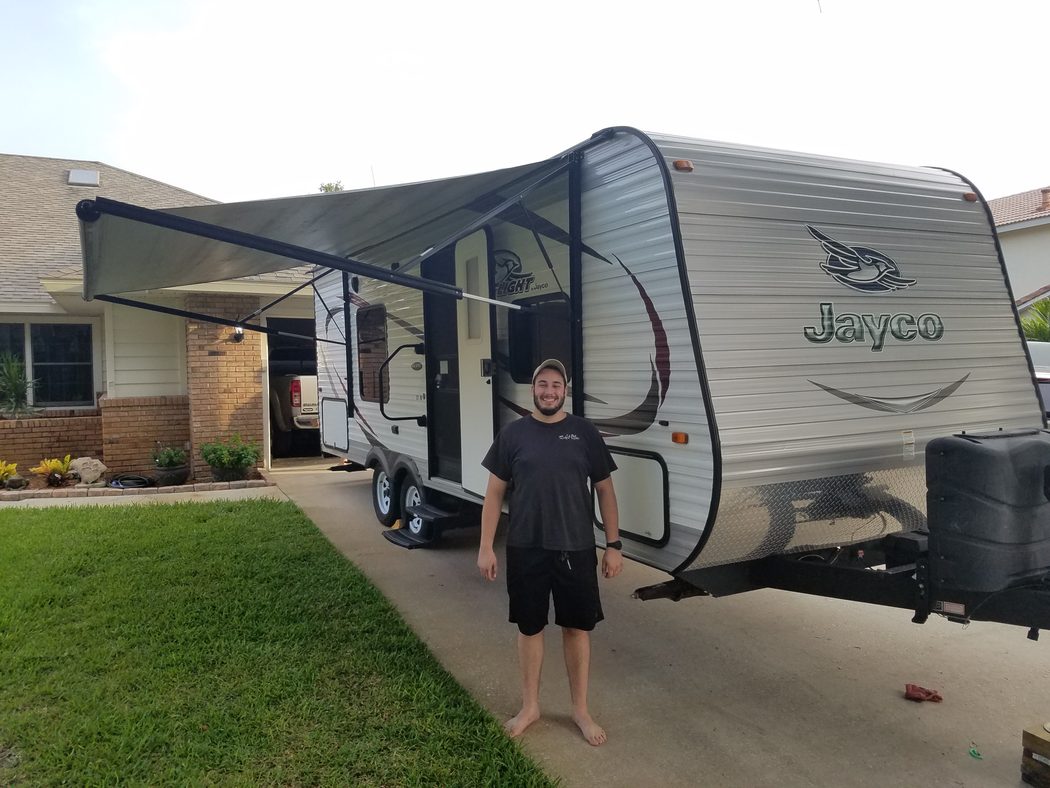
Becca and I are going on a combined work-vacation to New York. My son, Bobby, came home to help me do the required maintenance on our 2015 Jayco Jay Flight 23RB Travel Trailer. We basically followed the list that we created last year. It is my hope that we can help other camper owners finding themselves in a similar situation, and even add to this list next year based on comments and feedback received.

Here are some stats on our camper:

  • Years Owned: 3 years
  • Total Mileage: 8629 miles
  • Total Nights Camping: 112 Nights Camping

For the record, here is a list of all of the systems on which we performed preventative maintenance:

System Tasks Notes

Hitch

Configured backup assist N/A. In my opinion this is a complete waste.
Removed Gear Rust Used wire brush and Rustoleum rust reformer
Lubricated ball and sway connectors Used standard grease.

Propane

 Inspect  Hoses, connectors, and tanks in good repair
 Clean  Wiped down tanks, hoses, and fittings
 Refill  Took one tank to ACE Hardware and had it “topped off” for $14. Switched the backup tank to primary.

Undercarriage

 Inspect  Noticed some rust starting.

Roof

 Inspect Seams  Notices small holes and cracks starting in the seals. Will need to repair with Eternabond tape in the near future and definitely by next year.
 Repair issues  N/A. Will do Eternabond at next maintenance.

Stabilizers

 Inspect  Significant rust. Considering replacing when these become unserviceable.
 Lubricate  Sprayed liberally with silicone lubricant.

Steps

Paint  N/A. Did not paint steps.
 Lubricate hinges  Sprayed hinges with silicone lubricant.

Fresh Water

 Sanitize  Followed recommended procedure to drain, sanitized, flush, and refill the fresh water system. I may write a separate blog detailing that process.

Septic system

Clean tank Tank has been kept very clean over the last year so no action necessary.
Sanitize gear Gear was kept clean over the last year so no action was necessary.

Hot Water (Gas)

Test striker Lit and ran hot water heater on gas
Clean Cleaned using vacuum and compressed air

Refrigerator (Gas)

Test striker Lit and ran refrigerator on gas
Clean Cleaned using vacuum and compressed air

Stove (Gas)

Test striker Lit and ran stove on gas

Air Conditioner

Inpect and Clean filter Internal parts are starting to rust, but unit running well.

Awning

Clean Sprayed with LA’s Totally Awesome to kill mildew
Inspect Some rust on screw heads, etc.
Lubricate Sprayed liberally all joints and moving parts with silicone lubricant.

Wheels

Inspect Inspected rubber, hubs, and suspension. No issues.
Grease hubs Dexter EZ-Lube hubs were easy to re-grease by following instructions on YouTube.

Remembering My Wonderful Grandmother, Ruth Ritchie

Grandma-and-Tony

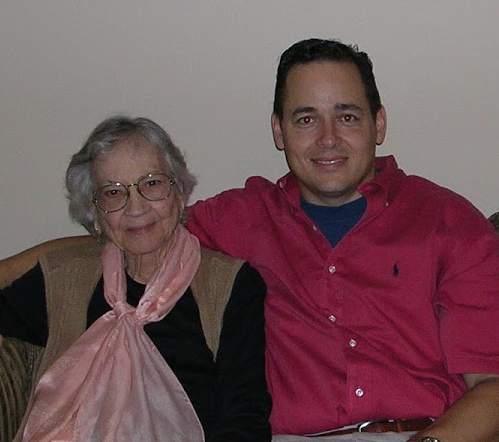
My Grandma, Ruth Alberta Taylor Ritchie, would have been 100 years old on May 16, 2018. She died Monday, July 30, 2007 at 89 years old. There is not a day that goes by that I don’t miss her. I was her only grandson and she proved over and over again to me that she loved me unconditionally. When I was a young man and I enlisted in the USMC, I called Grandma to tell her. After a long, thoughtful, pause she said (and I remember her words vividly) “Tony, I can’t say that doesn’t scare me and I can’t say that it makes me happy, but I do believe that you need to do what you think is right. I think that you can do anything you set your mind to and I am very proud of you. I will always love you.” That kind of love and care enabled me to do all kinds of things in my life. Grandma was born with one kidney and ended up on dialysis the last few years of her life. God bless my wonderful parents for taking such great care of her but being on dialysis at 89 years old is hard. One evening when I was sitting with Grandma to give Mom and Dad a well-deserved break. Grandma put her hand on my arm and she said, “Tony, I love you but I just can’t do this anymore.” Less than a week later, Grandma died. I was with her right before she died and my final words to her were, “Grandma, thank you for always believing in me and I will always love you.” I know she heard me.

Anthony Galluscio Art Loeb Trail Hike

Beautiful View from Art Loeb Trail

Hiking the Art Loeb Trail October 26 to 29, 2017

Quick Facts

  • Distance: 30.1
  • Duration: 4 Days
  • Difficulty:  Very Difficult
  • Terrain: Mountains
  • Human Impact: Low impact due to difficult terrain
  • Location: Brevard, NC
  • Start: Daniel Boone Boy Scout Camp
  • End: Davidson River Parking
  • Dates: October 26 to 29, 2017

Getting Started

Okay…. I just finished a different hike and I realized that I completely forgot to blog about this hike. To catch you up, I ended up NOT hiking the Georgia section of the AT in early October as I had originally planned. There was a tropical storm that blew through the area so I had to cancel. I still wanted to hike, though, with my daughter, Katie, and her boyfriend, Miguel. So, we selected the Art Loeb Trail in NC because it is shorter. Little did we know, the Art Loeb Trail is one the most difficult trails in North Carolina. We took a shuttle from Davidson River to Daniel Boone Boy Scout Camp.

Getting Started on the Art Loeb Trail

Day 1: Daniel Boone Boy Scout Camp to Deep Gap: 4 miles

We started this hike at the Boy Scout Camp where I actually went one summer with my oldest son, Bobby. We hiked the first 3.8 miles and it was dark by the time we got to camp.

Art Loeb Trail Section 1

Setting Up Camp the First Night

Day 2: Deep Gap to Gloucester Gap: 14 miles

We got an early start on day 2. Hiking through the Shining Rock Wilderness is difficult to navigate due to the intention lack of trail markings. We were vigilant and used a GPS when necessary.

There was a big storm coming within 24 hours with  100% chance of rain and high winds. We decided to push on to Gloucester Gap by going over 14 miles to get as close as possible to the shelter in butter gap.  When it became too dark to hike safely we stopped about four miles from the Butter Gap Shelter. The views were beautiful, but this was some of the most strenuous hiking I have done in recent memory. Check out the videos and pictures below to get an idea of how beautiful, and difficult, this trail is.

Note that when Hiking through the Shining Rock Wilderness a bear canister is mandatory. See a picture of the sign below:

Bear Canister Required

Day 3: Weathering the storm at Butter Gap Shelter: 4 miles

We got up early on day 3 to cold rain and started the four mile hike over multiple mountains to Butter Gap Shelter.  We got to the shelter and stayed there for 23 hours to weather the storm. It was a great chance to rest up!

Day 4: Butter Gap Shelter to Davidson River: 8 miles

On day 4 we got an early start and hiked back to the truck. The air was wonderful after the rain and the views were stunning.

We swapped packs, but we didn’t swap camelbacks:

Summary: I think the Art Loeb Trail is one of the most beautiful on the east coast of the US. However, it is also one of the most difficult so make sure you are ready for it!

Anthony Galluscio Prepping for the Appalachian Trail Hike of a Lifetime… literally

Appalachian Trail Hike Food

Words of Wisdom

My time as a machine gun team leader in the USMC infantry carrying sixty to eighty pounds of weapons and gear over incredible distances, developed in me a very dangerous muscle memory. As my wife often points out, “Remember, you are very capable of hurting yourself.”

My Situation

I have severe arthritis in my spine for which I take an immunosuppressant to block inflammation. As long as I stay on the medication I can walk unassisted and I am typically able to function fairly normally with periods of exacerbation that are moderately limiting usually only toward the end of a medication period. When I turned fifty, I decided that I would push myself to make sure I still have what it takes to be US Marine.

The Trial Hike

I packed a backpack full of forty-seven pounds of gear and supplies and headed out on a slow, but steady, thru-hike of the seventy-seven mile Foothills Trail. “Foothills” makes it sound easy, right? Wrong! There is actually a section of that trail called “Heartbreak Ridge.” To make a long story short, about one day into the hike my back started to flare up which had a domino effect of causing my pulse to race, which caused me to lack the extra cardio capacity to climb the hills, which caused me to overexert myself, which caused me to feel nauseated, which caused me to not eat, which meant I was low on energy without enough calories. I ended up breaking a cliff bar into 100 pieces and swallowing one little piece whole at a time. That is an example of how I had use brain rather than brawn to make it the distance.

So, if I told you that I intended to hike the entire 2200 miles of the Appalachian Trail, you would probably say that I am crazy.  Before you judge me, keep reading to see what I learned on my FHT hike:

Lessons Learned

  •  Just because I could easily carry a sixty to eighty pound pack in my 20’s means nothing now.  I can’t carry any more than 35 pounds without causing my arthritis to flare. On the FHT I carried 47 pounds.
  • I am going to lose weight rapidly as I hike so I have to limit my hike to less than 100 miles. On the FHT I lost 15 pounds in 7 days.
  • I need to pack foods that help me fight nausea. On the FHT I packed foods that CAUSE nausea.
  • I need to start the hike the day after an injection and NOT a week after (like I did on the foothills trail).
  • I can’t hike more than 12 miles per day. On the FHT, I had days as high as 15 miles.

My Plan

I am going to fully embrace those lessons learned and hike the Appalachian Trail at the rate of approximately 100 miles per year and finish when I am 73 years old.  As I said it is the hike of a lifetime.

I am starting soon and I will blog when I get back.  Here is how I am applying what I learned to my Appalachian Trail hike:

  • My total pack weight with 6 liters of water is 34.4 pounds!
  • My 2017 stretch of the AT is 86.1 miles.
  • I am bringing a variety of foods that will help with nausea.
  • I am starting the day after my injection.
  • My longest day is 12 miles.

Please stay tuned!! More to come!


Anthony Galluscio Camping Review #5: Pine Mountain RV Resort

Near Pine Mountain RV Resort

Anthony Galluscio Pine Mountain RV Resort Camping Review

We were forced to evacuate the barrier islands where we live in Florida for hurricane Irma.  We took my parents to a cottage in Callaway Gardens and we stayed in the camper for two nights at Pine Mountain RV Resort until Tropical Storm Irma arrived.

  • Campground: Pine Mountain RV Resort

  • Nights Camping: 2 (September 8 to 9, 2017)

  • Nearest City:  Pine Mountain, GA

  • Space Number:  58

  • Hookups:  Water/Electric/Sewer

  • Cost per Night:  $47

  • Likes:  Clean, quiet, well maintained. Very friendly people.

  • Dislikes: Sewer hookup on neighboring spot is very close to the front of our camper. Also, I am concerned about the potential for sap from the pine trees.

  • Notes: Ask for a spot in the open area in the back when we stay there again.

  • Rating:  Good

  • Link: http://www.rvcoutdoors.com/pine-mountain/