RV & Camping

Replacing the Rear Camera on My Tiffin Open Road 29NA with a Furrion Vision S

One of the things I wanted to fix on our 2026 Tiffin Allegro Open Road 29NA was the rear camera.

The OEM camera was unreliable. Both the dealership and the Tiffin service center tried to fix it, but neither was able to make it reliable. Even when it worked, I wasn't particularly happy with the image quality or the position of the camera.

There was another problem that was just as important to me. The OEM camera shared a display with the navigation system, entertainment system, and the other cameras on the coach. When we're flat towing our Jeep, I want to be able to look up at any time and see the Jeep and the traffic behind it. I wanted the equivalent of a rearview mirror, not another selectable camera on a shared display.

My solution was to install a Furrion Vision S as a completely independent observation camera system with its own dedicated monitor.
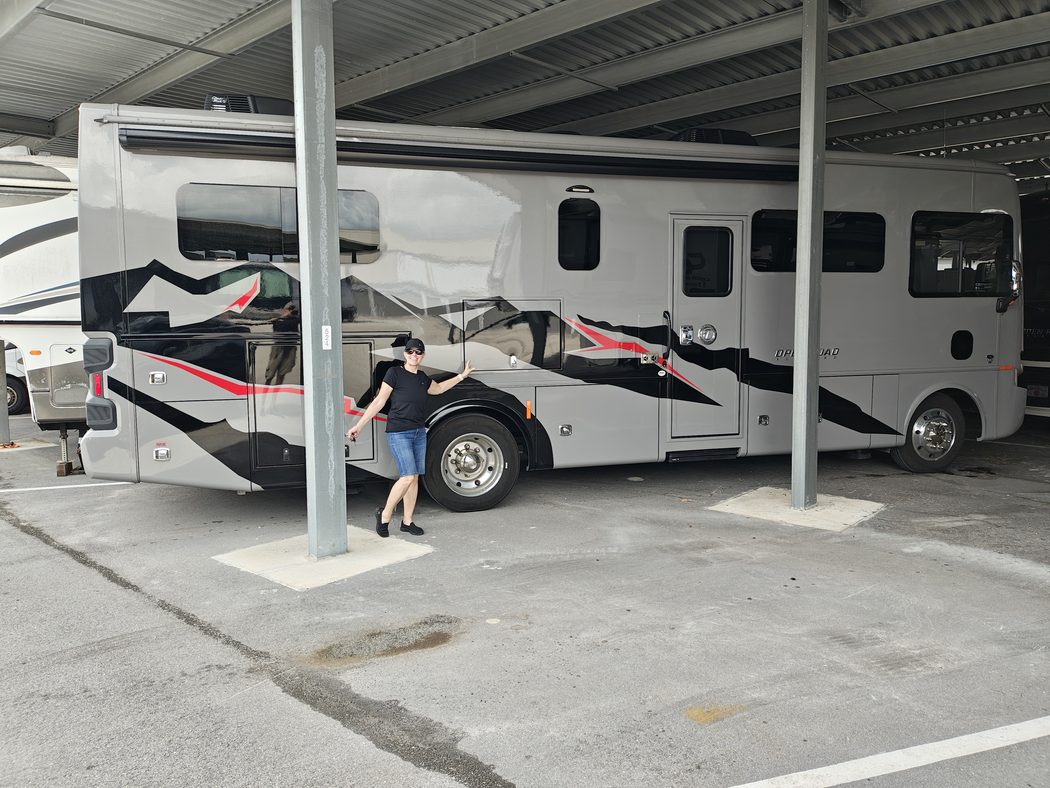
Our 2026 Tiffin Allegro Open Road 29NA motorhome
This is our motor home.

Challenge

I initially spent time trying to get the OEM camera working correctly and also investigated whether I could reuse its wiring for the Furrion.

In retrospect, I wouldn't do either again.

The OEM wiring was potentially part of the original problem, and it didn't provide the simple, direct power source I needed for the Furrion. Rather than continuing to troubleshoot a system I already didn't trust, I decided to bypass it.

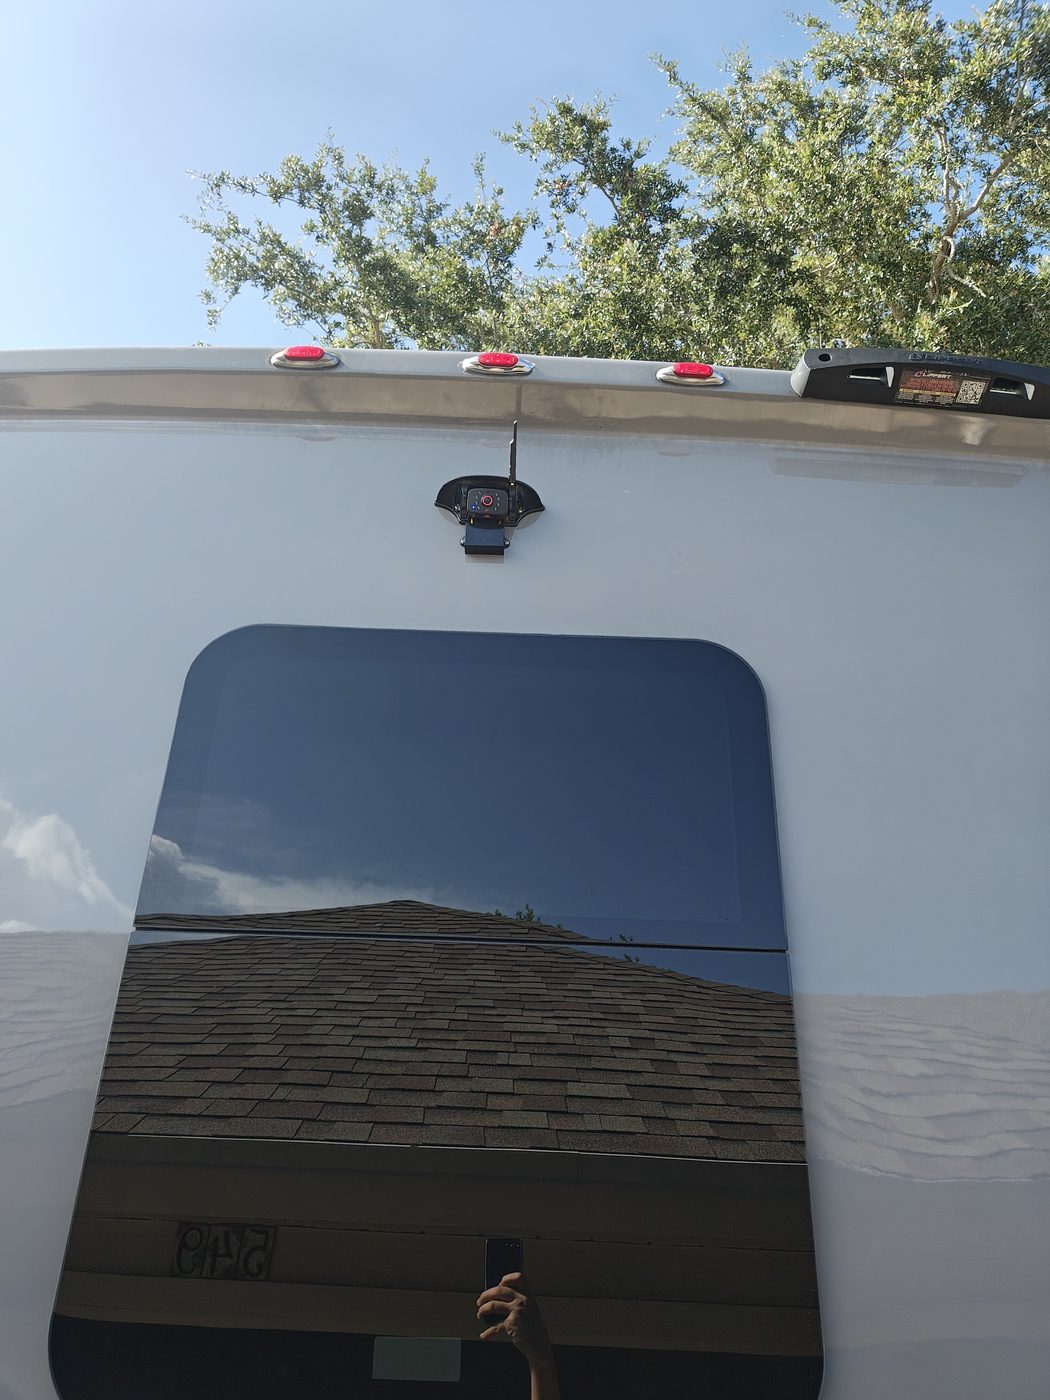
I did, however, reuse the existing hole from the OEM camera. That gave me a good location for the Furrion without drilling another camera hole into the rear of the coach.

Directly above the camera is the center upper marker light.

That turned out to be the key to the installation.
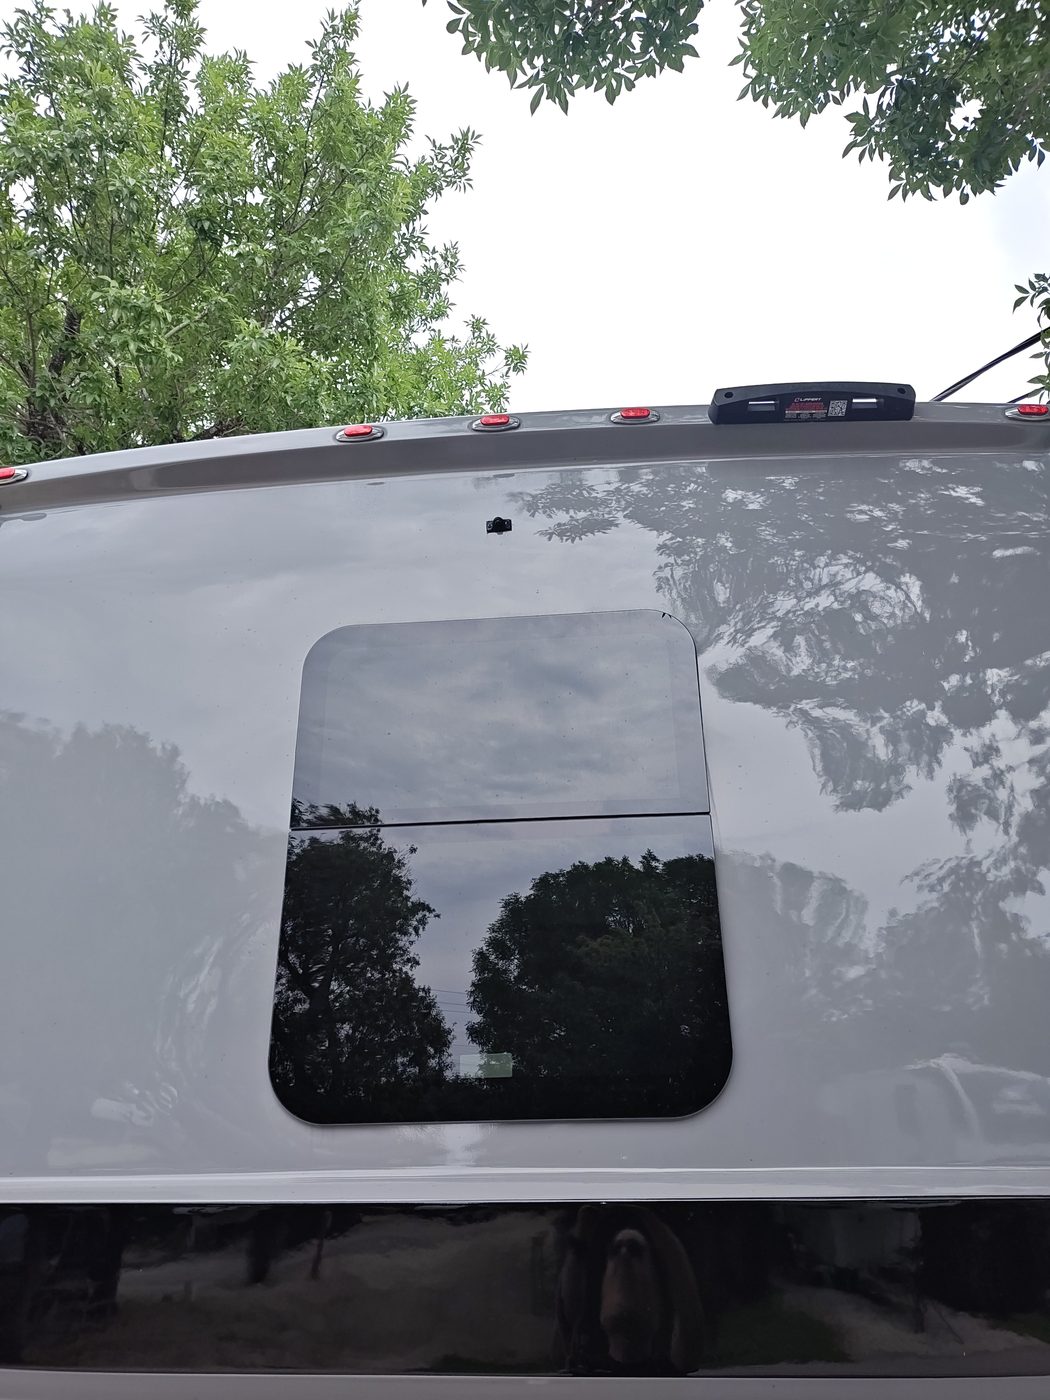
Rear of the Tiffin showing the camera location and center upper marker light
Rear of the coach showing the camera location and center marker light directly above it.

Solution

Getting Power to the Camera

I removed the center marker light and determined that I could use its running-light circuit to power the Furrion.

To get the new power wire from the marker-light opening down to the camera opening, I used a stiff piece of non-electrical wire and fashioned a hook on the end. I used that to snag and pull the new wire between the two openings.

It was simple and saved me from having to open anything else up.
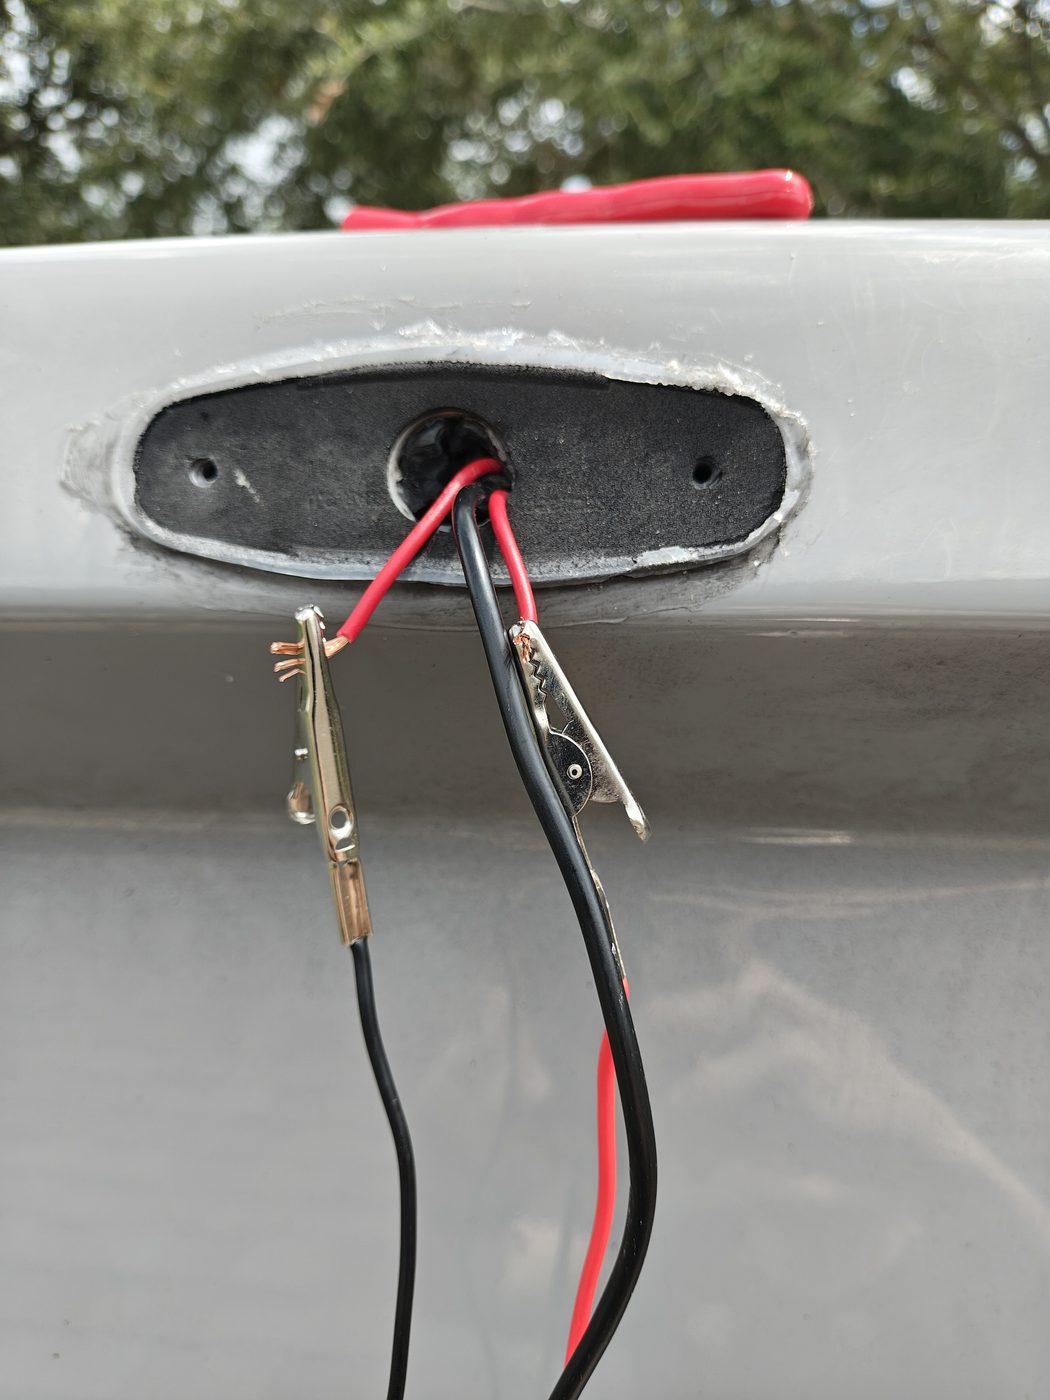
Center upper marker light removed with the running-light wiring exposed
The center marker light removed while I worked with the running-light circuit.

I made the electrical connections using heat-shrink crimp connectors to help protect them from moisture.

There is one consequence of powering the camera this way: the coach's running lights have to be on for the Furrion camera to operate.

I'm perfectly happy with that. When I'm driving and want the observation camera, I simply have the running lights on. But it's important to know if you're considering doing the same thing.

At this point, I thought I was basically finished.

I wasn't.

The 11.4-Volt Problem

The camera worked perfectly while the coach was sitting with the engine off.

Then I started the engine.

The camera shut itself off.

That was an interesting problem because nothing had changed with the camera itself. It worked with the engine off and stopped working with the engine running.

So I got out the multimeter.

I measured the voltage on the circuit with the engine off and then measured it again with the engine running. With the engine running, the voltage at the camera dropped to approximately 11.4 volts.

That was low enough that the Furrion would shut itself down.
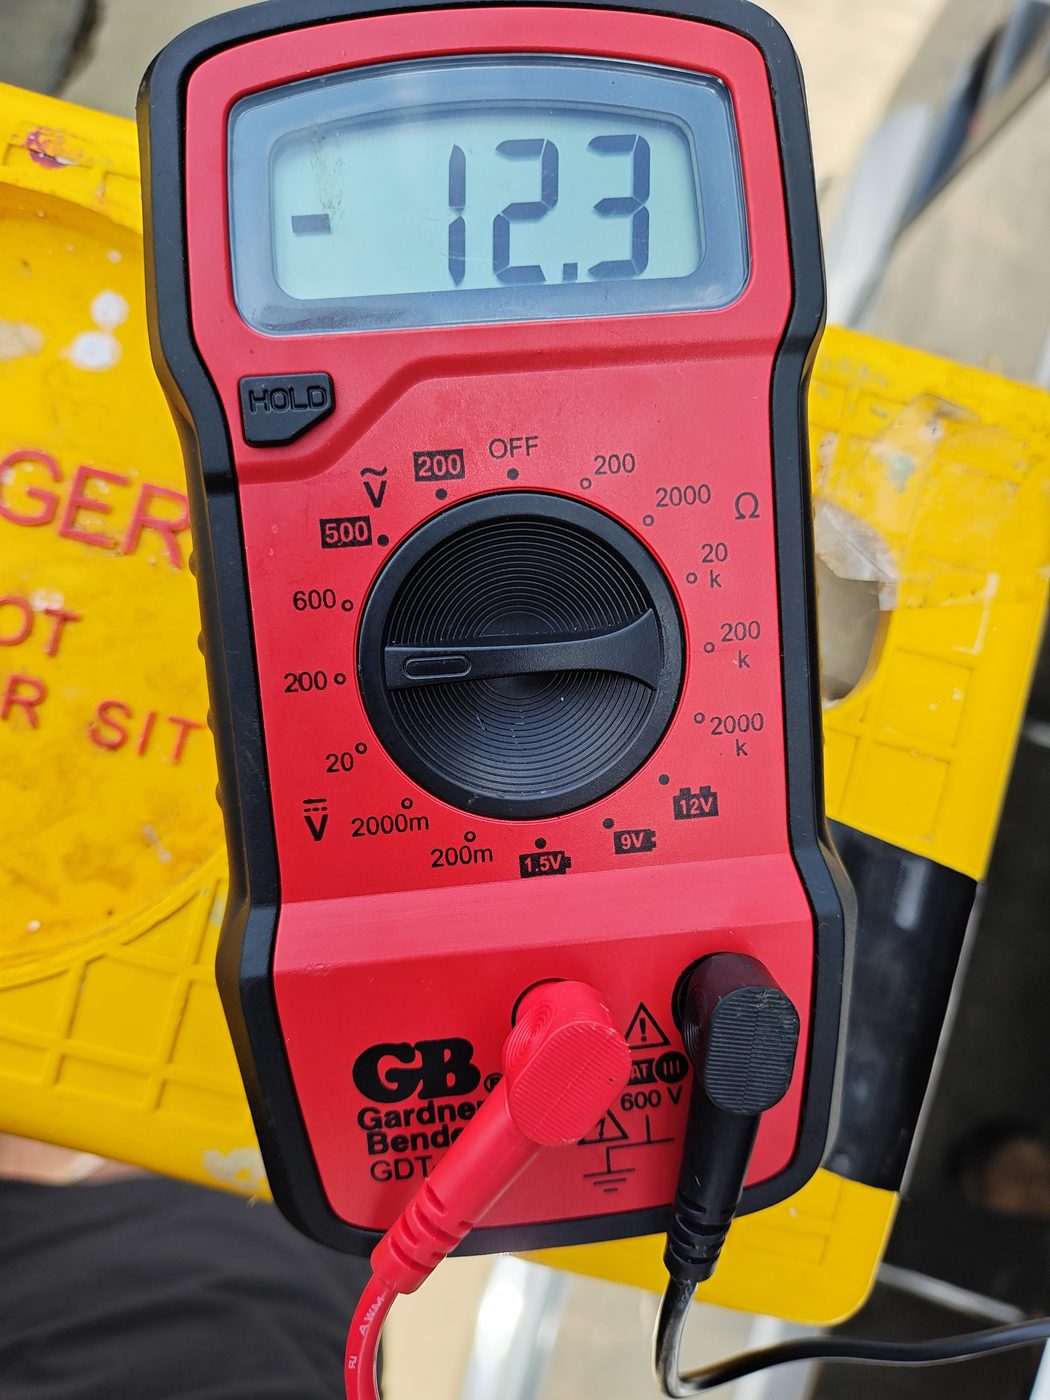
Multimeter used while testing voltage on the marker-light camera power circuit
Testing the marker-light circuit with a multimeter helped isolate the voltage problem.

That testing was important because it isolated the problem. I wasn't dealing with another bad camera, a wireless connection problem, or something mysterious in the Furrion system. The camera simply wasn't getting sufficient voltage under the conditions in which I actually needed to use it.

Now I needed a way to provide the camera with a stable 12-volt supply.

Adding the DROK Regulator

My first thought was to find something small enough to fit inside the camera housing. That would have made for the cleanest installation.

I couldn't find a suitable solution that was small enough.

Instead, I found a DROK weatherproof DC voltage regulator that accepts a 9–36V input and provides a regulated 12V output.

Because it is a small weatherproof black box, I could mount it externally. I installed it immediately below the Furrion camera.
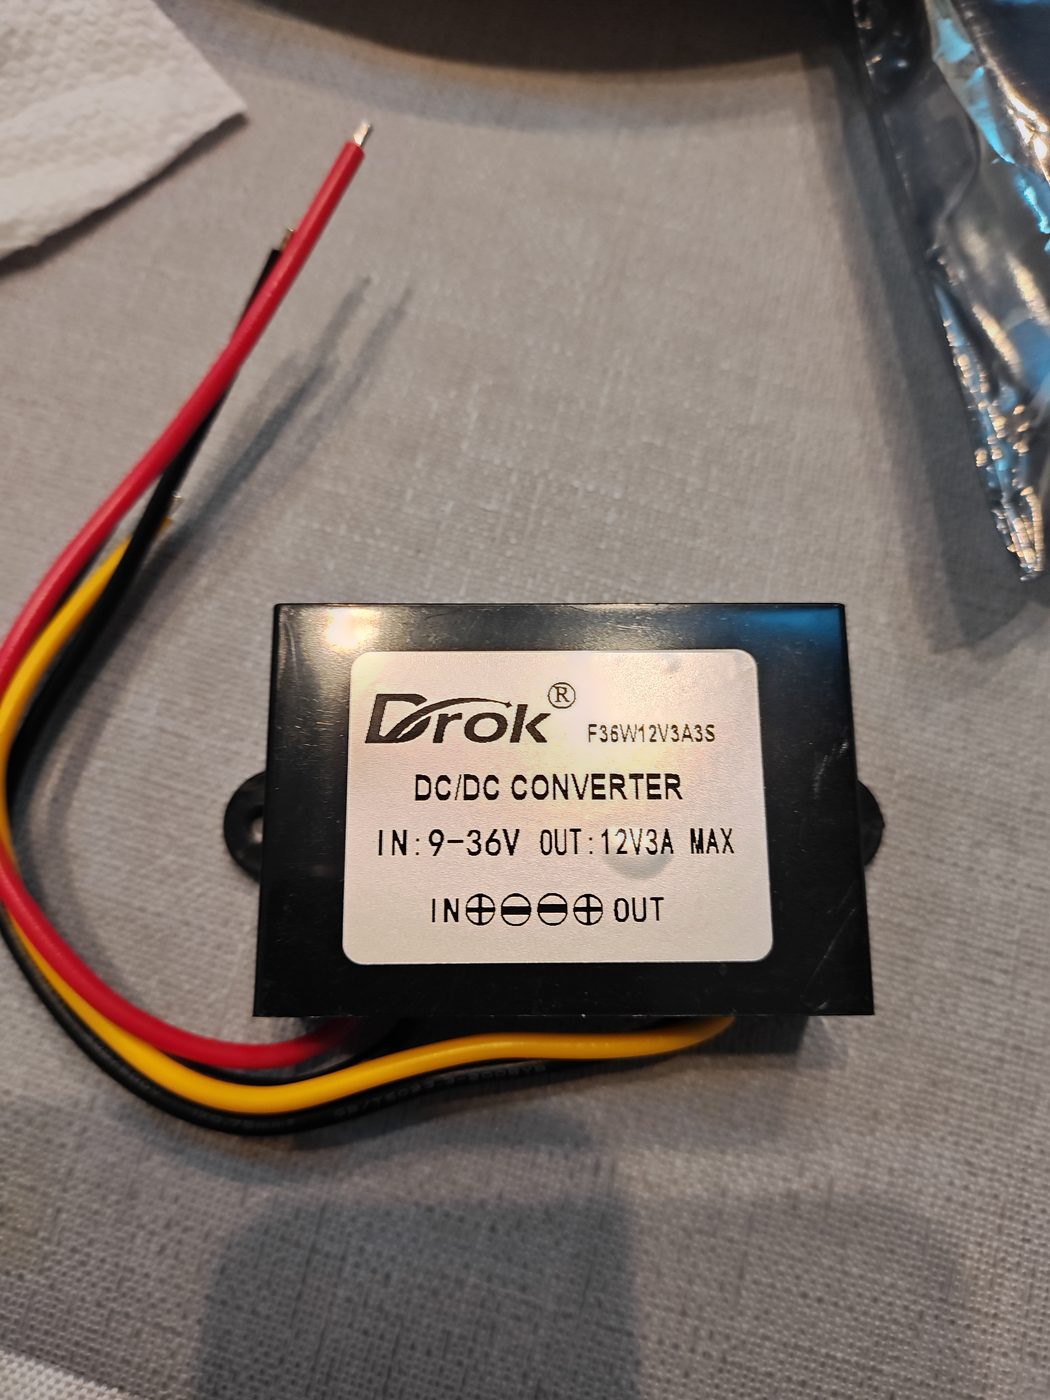
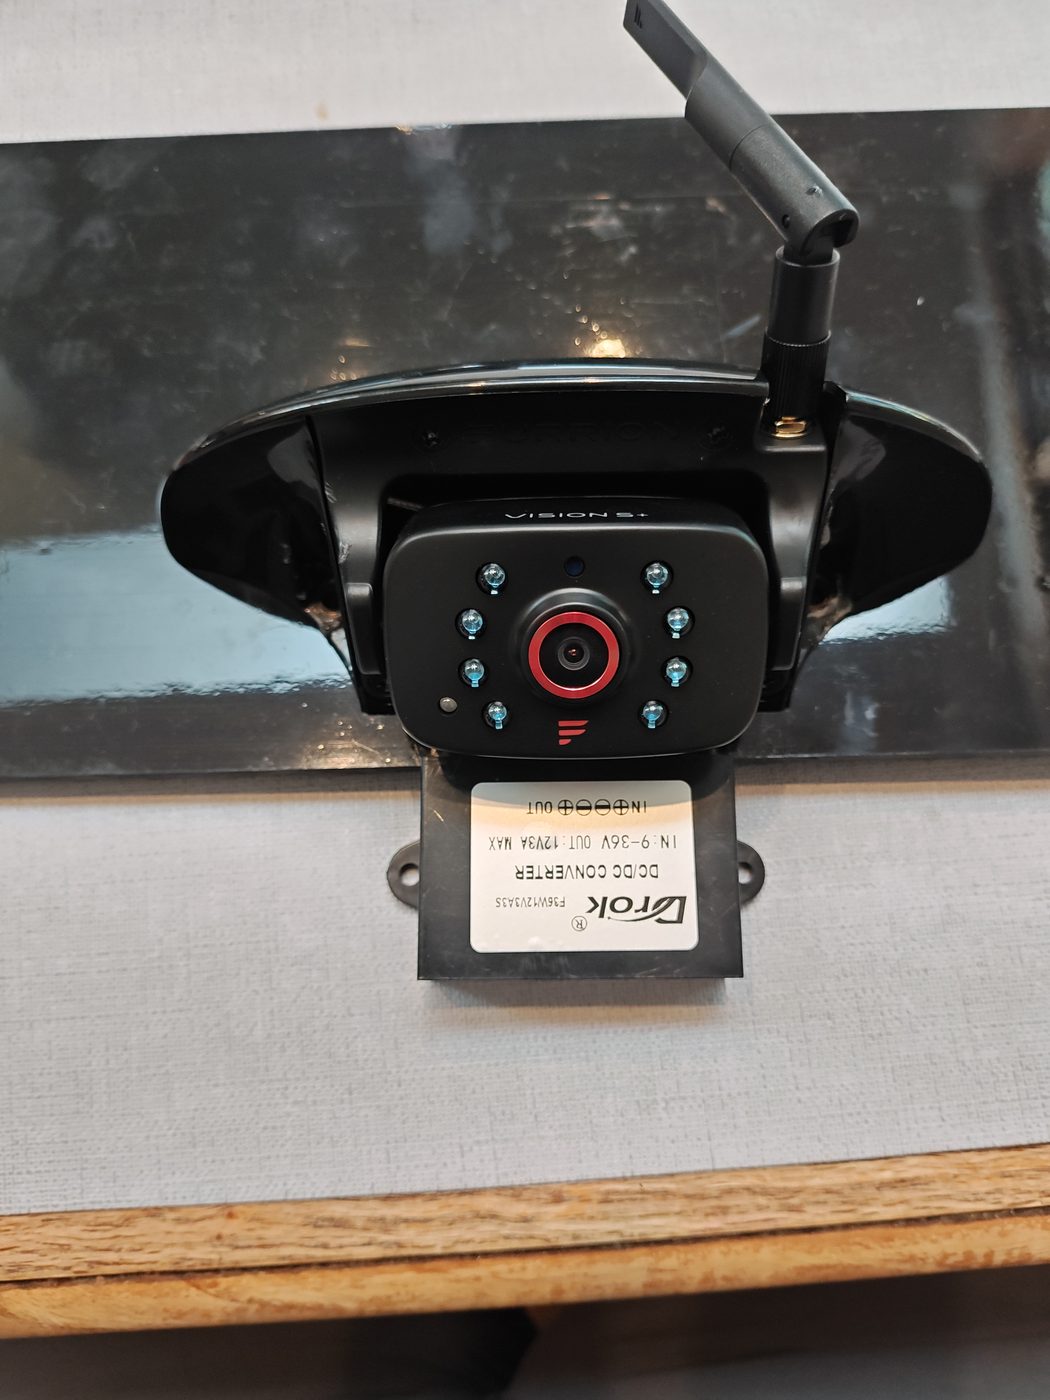
Weatherproof DROK DC to DC voltage regulator used to provide regulated 12-volt power
The weatherproof DROK DC/DC regulator I used to provide a stable 12-volt supply.
Furrion Vision S camera and DROK voltage regulator assembled before installation
The Furrion camera and DROK regulator assembled before installation.
Finished Furrion Vision S rear camera installation on the Tiffin
The finished camera installation on the rear of the coach.

The power arrangement was now straightforward: power comes from the center marker/running-light circuit, passes through the DROK regulator, and then supplies the Furrion camera with regulated 12V power.

I tested the system again under the condition that had caused the original failure: with the engine running.

This time the camera stayed on.

That solved the problem.

Mounting the Monitor

I wanted the monitor in a position that felt natural while driving. I didn't want it sitting on the dashboard or attached to the windshield.

Our 29NA has the cabinet above and between the pilot and copilot where Tiffin offers an optional front television. I had removed that TV, which gave me a convenient way to route the wiring for the Furrion monitor.

For the mount itself, I reused the tabletop/dash mount that came with the Furrion monitor.

I drilled mounting holes in the Furrion stand, flipped it upside down, and bolted it directly to the underside of the empty TV cabinet. I used stainless-steel bolts, washers, and locknuts.

The result puts the monitor almost exactly where a rearview mirror would naturally be in a car.

For the power cable, I drilled a 1/2-inch hole through the underside of the cabinet.

I happened to have a bag of assorted rubber grommets in my garage, and one fit the hole perfectly. I installed the grommet so the power cable passes through rubber instead of rubbing against the raw edge of the drilled hole.

The cable runs through the cabinet to a plug in the upper-left cabinet.

An advantage of doing it this way is that I can simply unplug the monitor if I ever want to remove it.
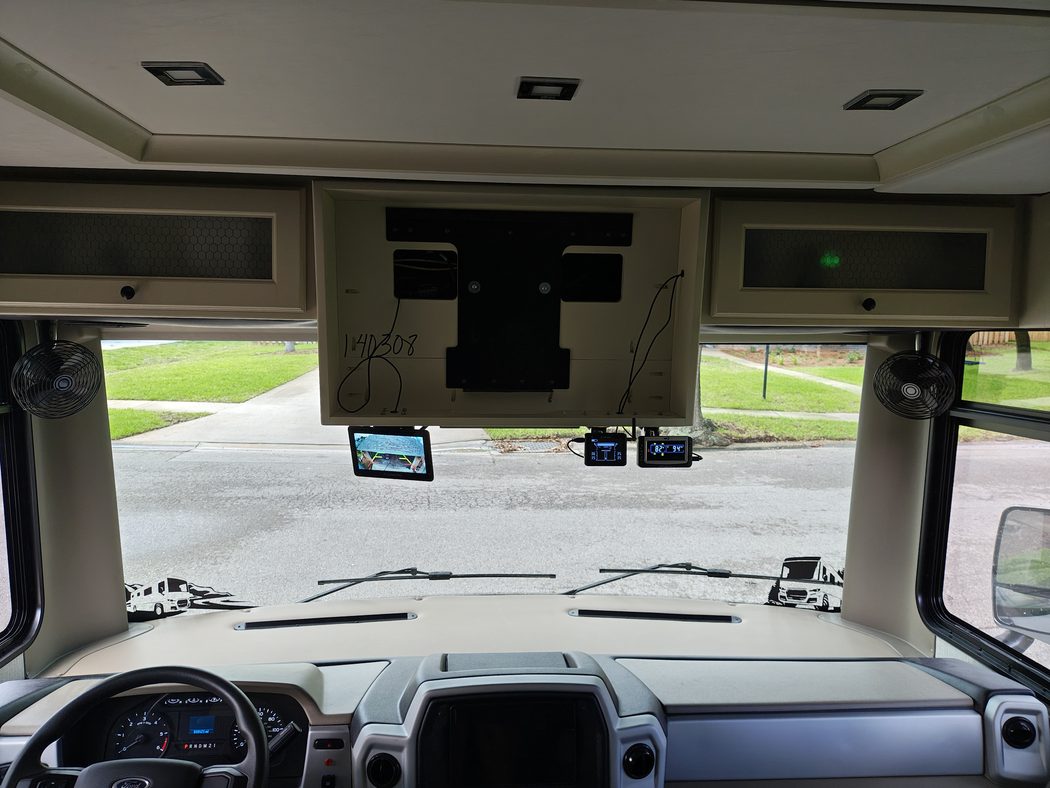
Furrion Vision S monitor mounted beneath the front television cabinet
The finished monitor installation beneath the front TV cabinet.

Outcome

The result has been better than I expected.

The image is extremely clear, and the camera gives me exactly the view I wanted. I can see the entire Jeep while we're towing it, as well as vehicles approaching from behind.

The position of the monitor is also nearly perfect. Looking at it feels natural—very much like glancing at the rearview mirror in a car.
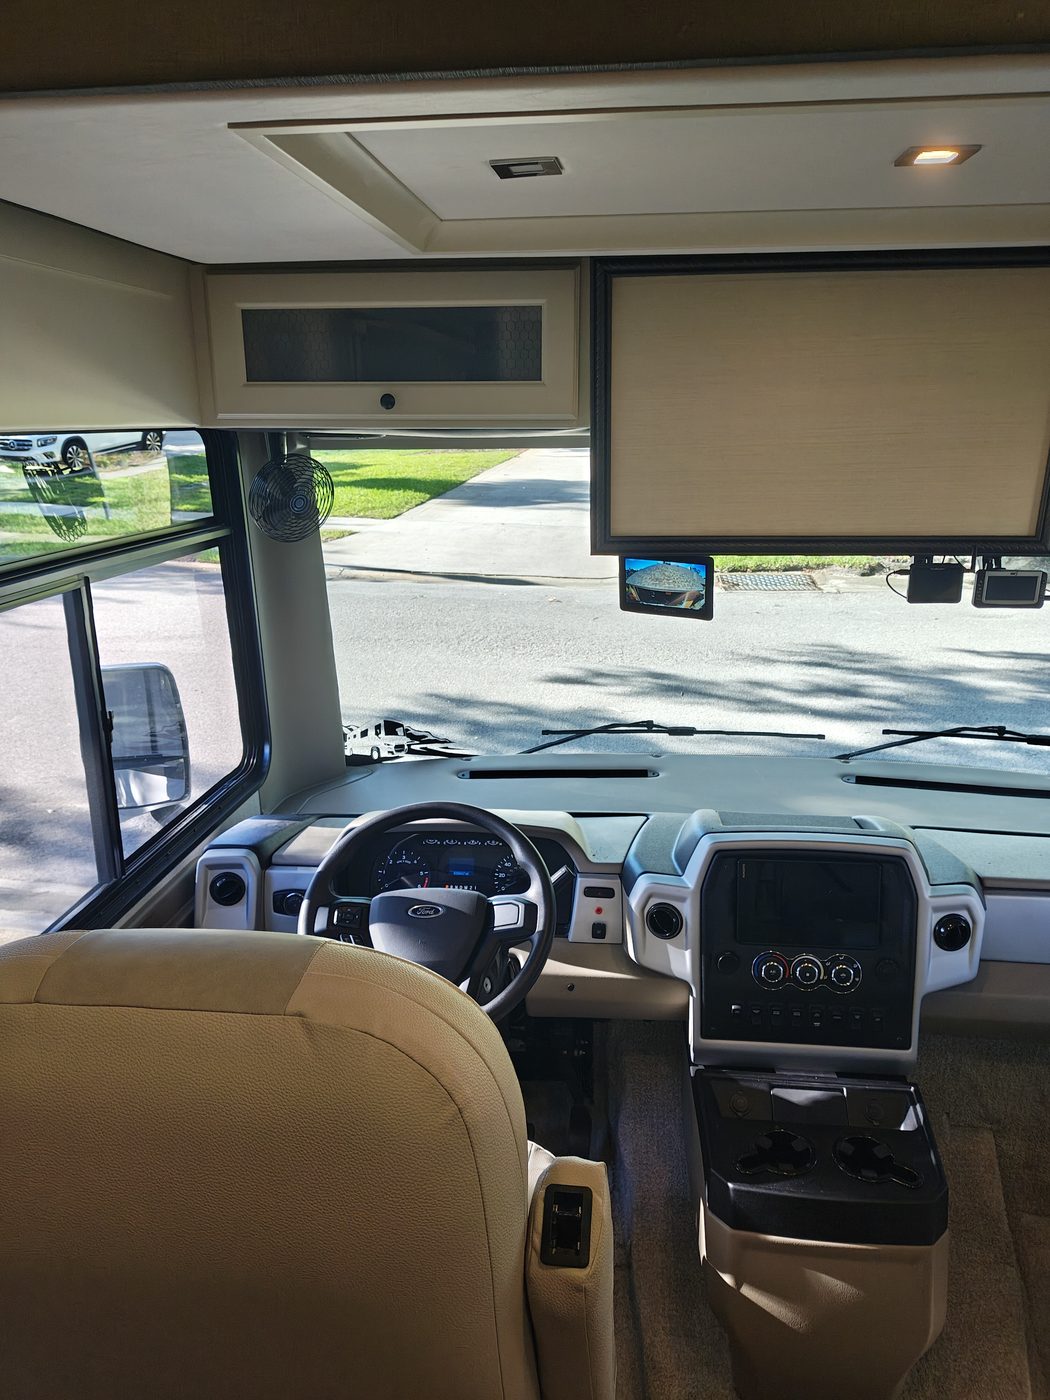
Driver's view of the Furrion monitor mounted above the windshield
Ready to roll. The monitor sits naturally in my line of sight much like a rearview mirror.

Most importantly, the system has proven itself on the road.

We've driven approximately 3,000 miles with this installation, including some particularly rough roads in South Carolina. The wireless connection has been 100% stable. I've had no problems with the camera, the monitor mount, or the DROK installation.

There is one characteristic of the Furrion image that took some getting used to: objects are considerably closer than they appear on the monitor.

After driving with it for a while, I've adjusted to that. I don't use the monitor to judge precise following distances anyway. Its primary purpose is situational awareness: I can see the Jeep, see what's happening around it, and see vehicles approaching from behind.

For that purpose, it works extremely well.

What I'd Do Differently

There are a few things I'd change if I did the project again.

First, I wouldn't spend time trying to fix the OEM camera. The dealership and Tiffin had already tried, and I ultimately replaced it anyway.

I also wouldn't spend time investigating whether I could reuse the OEM camera wiring. Building an independent system with its own power source turned out to be the better solution.

Second, I'd be a little more careful during the wiring. I forgot to heat-shrink one of my connections before reinstalling the marker light, which meant I had to take the marker light off a second time to finish the job properly. That was entirely avoidable.

Finally, I used silicone to seal around the camera and marker light. It has worked, but I think there are probably better sealing products for this application. If I were doing the installation again, I'd investigate the alternatives before automatically reaching for silicone.

Other than those things, I wouldn't change the design.

I wouldn't change the camera location.

I wouldn't change the monitor location.

I wouldn't change the basic approach of powering the camera from the center marker/running-light circuit and using a regulator to provide stable 12V power.

And after 3,000 miles—including some pretty rough roads—I certainly wouldn't change the Furrion system based on its performance.

The project started because I was tired of an unreliable OEM camera. What I ended up with is considerably better than simply repairing it would have been: a dedicated observation camera that functions much more like the rearview mirror I wanted in the first place.
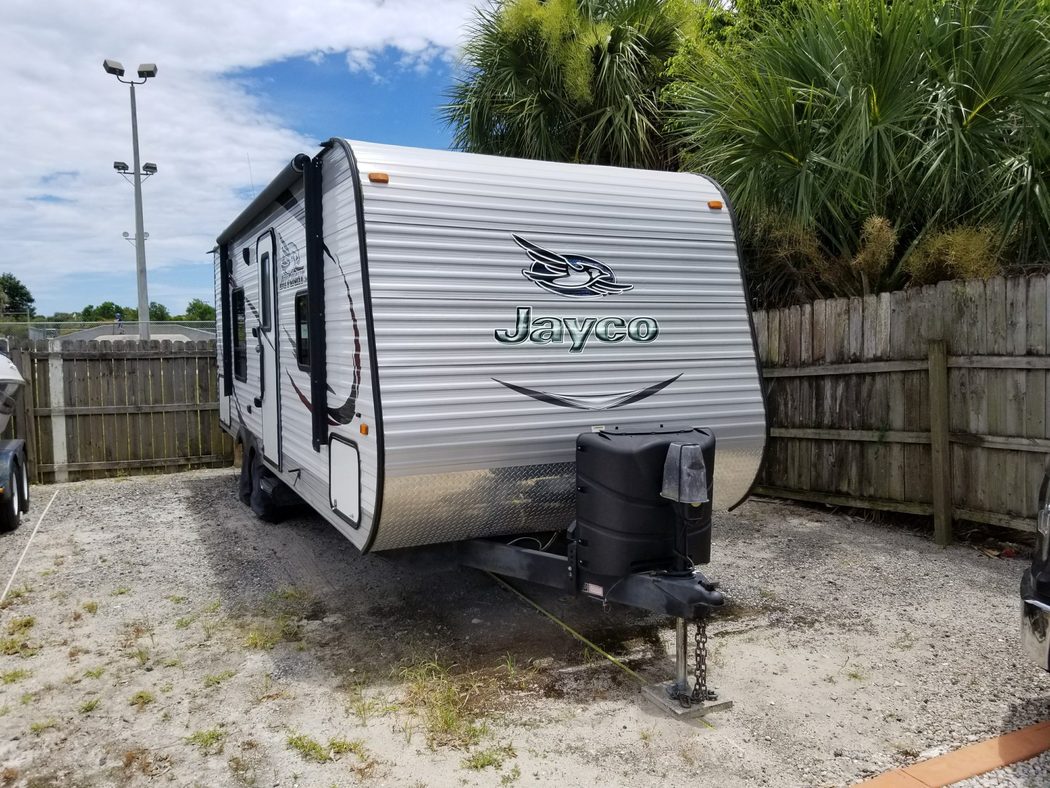
2020 Annual Camper Maintenance

2020 Camper Maintenance

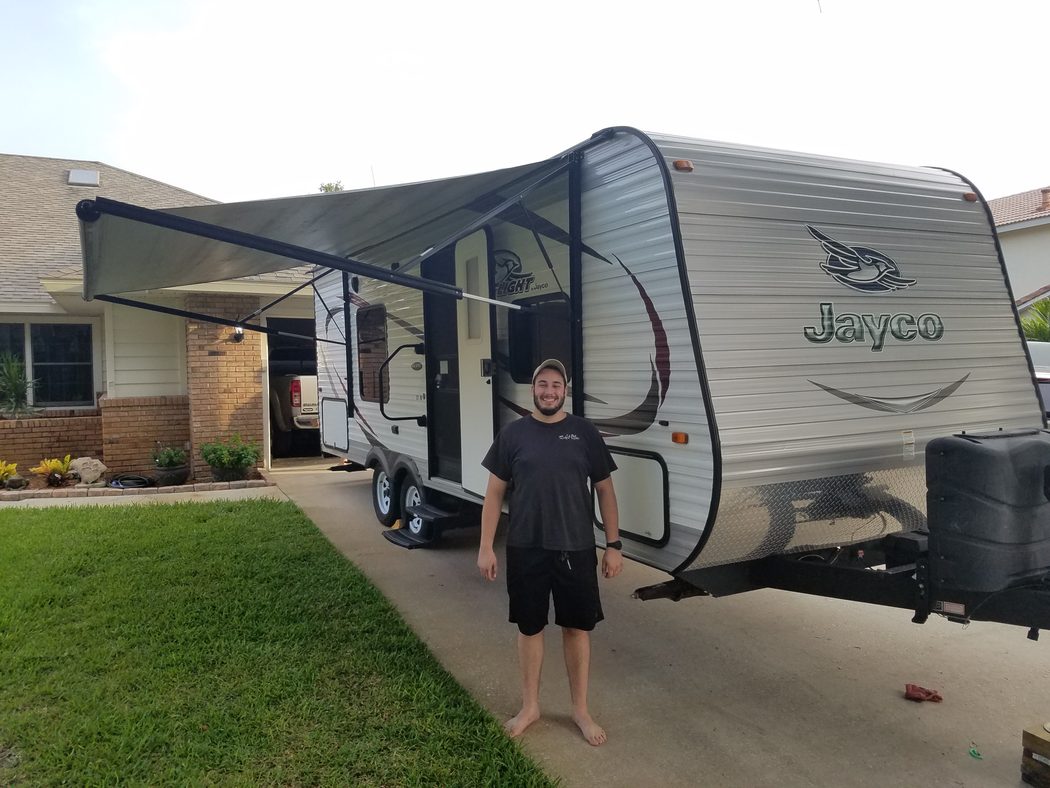
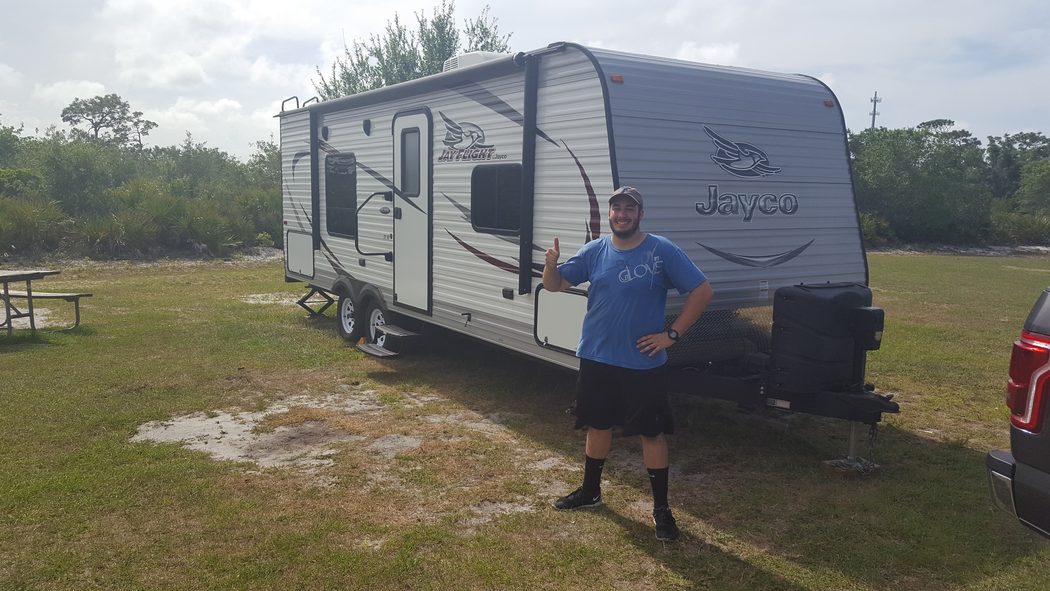
Due to the pandemic our camper sat unused for 8 months so I decided to do the camper maintenance a bit early on my own this year. Bobby normally helps me with this but he is a Respiratory Therapist working in Gainesville, FL. So, I performed the required maintenance on our 2015 Jayco Jay Flight 23RB Travel Trailer to for a trip to Paynes Prairie to help our two younger, Stevie and Charlie, move into their new place to start the new academic year at University of Florida. I somewhat followed the same list as previous years.

Here are some stats on our camper as of July 18, 2020 when the maintenance was performed.:

  • Years Owned: 5 years, 2 months
  • Total Mileage: 17133 miles
  • Total Nights Camping: 166 Nights Camping

For the record, here is a list of all of the systems on which we performed preventative maintenance:

System Tasks Notes

Hitch

Configured backup assist N/A. In my opinion this is a complete waste.
Removed Gear Rust N/A
Lubricated ball and sway connectors Used standard grease.

Propane

 Inspect  Hoses, connectors, and tanks in good repair
 Clean  N/A
 Refill  Refilled before previous trip was canceled

Undercarriage

Inspect Noticed even more rust. Still need to plan some time to work on this.

Roof

Inspect Seams Last year we repaired with Eternabond tape and it is holding nicely.
Repair issues Broke one skylight while cleaning the roof. Had to replace and sealed with eternabond.

Stabilizers

Inspect Replaced with removable 7500 lb stabilizer jacks that we keep inside the house (rather than letting them rust on the camper).
Lubricate N/A. New stabilizers

Steps

Paint N/A. Painted earlier in year.
 Lubricate hinges Lubricated earlier in year

Fresh Water

 Sanitize  Followed recommended procedure to drain, sanitized, flush, and refill the fresh water system. I should write a separate blog detailing that process.

Septic system

Clean tank Tank has been kept very clean over the last year so no action necessary.
Sanitize gear Gear was kept clean over the last year so no action was necessary.

Hot Water (Gas)

Test striker Lit and ran hot water heater on gas. Removed wasp nests
Clean Cleaned using vacuum and compressed air

Refrigerator (Gas/Electric)

Test striker Lit and ran refrigerator on gas. Cleaned out wasp nests. Ran until cold on both gas and electric.
Clean Cleaned using vacuum and compressed air

Stove (Gas)

Test striker Lit and ran stove on gas

Air Conditioner

Inpect and Clean filter Internal parts are starting to rust. Unit is not running as efficiently. Added an additional window AC unit that we can use as necessary during really hot months.

Awning

Clean Sprayed with bleach water to kill mildew. Actually cleaned up nicely
Inspect Some rust on screw heads, etc.
Lubricate Sprayed liberally all joints and moving parts with silicone lubricant.

Wheels

Inspect New tires this year. Inspected rubber, hubs, and suspension. No issues.
Grease hubs N/A. Will do this next year.
TPMS Replaced batteries in the tire pressure monitoring system (TPMS)

2019 Annual Camper Maintenance

2019 Camper Maintenance

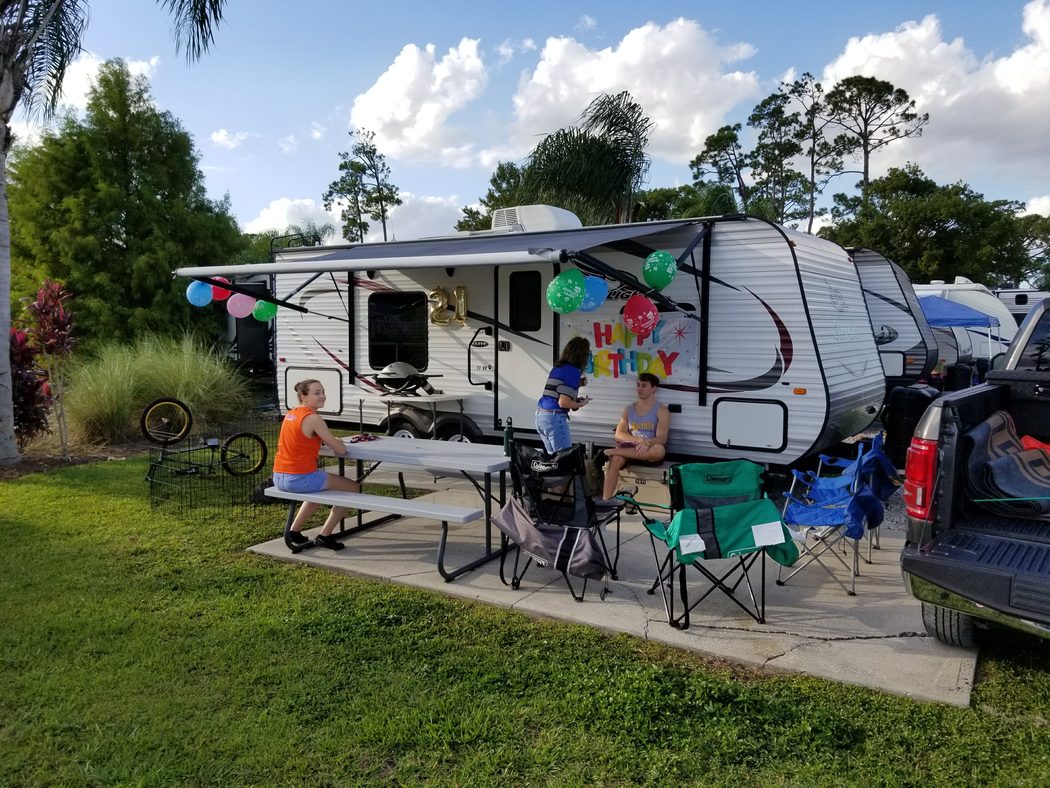
My son, Bobby, came home October 10-11 2019 to help me do the required maintenance on our 2015 Jayco Jay Flight 23RB Travel Trailer for a celebration we had in Orlando for my son, Stevie's, 21st birthday. This year we were a bit late doing the maintenance, but better late than never. We basically followed the same list that we created last year.

Here are some stats on our camper:

  • Years Owned: 4 years
  • Total Mileage: 15168 miles
  • Total Nights Camping: 161 Nights Camping

For the record, here is a list of all of the systems on which we performed preventative maintenance:

System Tasks Notes

Hitch

Configured backup assist N/A. In my opinion this is a complete waste.
Removed Gear Rust Sprayed with PB Blaster
Lubricated ball and sway connectors Used standard grease.

Propane

 Inspect  Hoses, connectors, and tanks in good repair
 Clean  N/A
 Refill  N/A. Need to fill before trip.

Undercarriage

 Inspect  Noticed even more rust. Need to plan some time to work on this.

Roof

 Inspect Seams  Last year we repaired with Eternabond tape and it is holding nicely.
 Repair issues  N/A. Eternabond done.

Stabilizers

 Inspect  Significant rust. Considering replacing when these become unserviceable.
 Lubricate  Sprayed liberally with PB Blaster.

Steps

Paint  N/A. Did not paint steps.
 Lubricate hinges  Sprayed hinges with PB Blaster.

Fresh Water

 Sanitize  Followed recommended procedure to drain, sanitized, flush, and refill the fresh water system. I may write a separate blog detailing that process.

Septic system

Clean tank Tank has been kept very clean over the last year so no action necessary.
Sanitize gear Gear was kept clean over the last year so no action was necessary.

Hot Water (Gas)

Test striker Lit and ran hot water heater on gas. Removed wasp nests
Clean Cleaned using vacuum and compressed air

Refrigerator (Gas)

Test striker Lit and ran refrigerator on gas. Cleaned out wasp nests
Clean Cleaned using vacuum and compressed air

Stove (Gas)

Test striker Lit and ran stove on gas

Air Conditioner

Inpect and Clean filter Internal parts are starting to rust. Unit is not running as efficiently.

Awning

Clean Sprayed with LA's Totally Awesome to kill mildew
Inspect Some rust on screw heads, etc.
Lubricate Sprayed liberally all joints and moving parts with silicone lubricant.

Wheels

Inspect Inspected rubber, hubs, and suspension. No issues.
Grease hubs Dexter EZ-Lube hubs were easy to re-grease by following instructions on YouTube.

2018 Annual Camper Maintenance

Anthony Galluscio Camper Maintenance

Becca and I are going on a combined work-vacation to New York. My son, Bobby, came home to help me do the required maintenance on our 2015 Jayco Jay Flight 23RB Travel Trailer. We basically followed the list that we created last year. It is my hope that we can help other camper owners finding themselves in a similar situation, and even add to this list next year based on comments and feedback received. Here are some stats on our camper:
  • Years Owned: 3 years
  • Total Mileage: 8629 miles
  • Total Nights Camping: 112 Nights Camping
For the record, here is a list of all of the systems on which we performed preventative maintenance:
System Tasks Notes

Hitch

Configured backup assist N/A. In my opinion this is a complete waste.
Removed Gear Rust Used wire brush and Rustoleum rust reformer
Lubricated ball and sway connectors Used standard grease.

Propane

 Inspect  Hoses, connectors, and tanks in good repair
 Clean  Wiped down tanks, hoses, and fittings
 Refill  Took one tank to ACE Hardware and had it "topped off" for $14. Switched the backup tank to primary.

Undercarriage

 Inspect  Noticed some rust starting.

Roof

 Inspect Seams  Notices small holes and cracks starting in the seals. Will need to repair with Eternabond tape in the near future and definitely by next year.
 Repair issues  N/A. Will do Eternabond at next maintenance.

Stabilizers

 Inspect  Significant rust. Considering replacing when these become unserviceable.
 Lubricate  Sprayed liberally with silicone lubricant.

Steps

Paint  N/A. Did not paint steps.
 Lubricate hinges  Sprayed hinges with silicone lubricant.

Fresh Water

 Sanitize  Followed recommended procedure to drain, sanitized, flush, and refill the fresh water system. I may write a separate blog detailing that process.

Septic system

Clean tank Tank has been kept very clean over the last year so no action necessary.
Sanitize gear Gear was kept clean over the last year so no action was necessary.

Hot Water (Gas)

Test striker Lit and ran hot water heater on gas
Clean Cleaned using vacuum and compressed air

Refrigerator (Gas)

Test striker Lit and ran refrigerator on gas
Clean Cleaned using vacuum and compressed air

Stove (Gas)

Test striker Lit and ran stove on gas

Air Conditioner

Inpect and Clean filter Internal parts are starting to rust, but unit running well.

Awning

Clean Sprayed with LA's Totally Awesome to kill mildew
Inspect Some rust on screw heads, etc.
Lubricate Sprayed liberally all joints and moving parts with silicone lubricant.

Wheels

Inspect Inspected rubber, hubs, and suspension. No issues.
Grease hubs Dexter EZ-Lube hubs were easy to re-grease by following instructions on YouTube.

Anthony Galluscio Camping Review #5: Pine Mountain RV Resort

Anthony Galluscio Pine Mountain RV Resort Camping Review

We were forced to evacuate the barrier islands where we live in Florida for hurricane Irma.  We took my parents to a cottage in Callaway Gardens and we stayed in the camper for two nights at Pine Mountain RV Resort until Tropical Storm Irma arrived.
  • Campground: Pine Mountain RV Resort

  • Nights Camping: 2 (September 8 to 9, 2017)

  • Nearest City:  Pine Mountain, GA

  • Space Number:  58

  • Hookups:  Water/Electric/Sewer

  • Cost per Night:  $47

  • Likes:  Clean, quiet, well maintained. Very friendly people.

  • Dislikes: Sewer hookup on neighboring spot is very close to the front of our camper. Also, I am concerned about the potential for sap from the pine trees.

  • Notes: Ask for a spot in the open area in the back when we stay there again.

  • Rating:  Good

  • Link: http://www.rvcoutdoors.com/pine-mountain/

Anthony Galluscio Camping Review #4: Crooked River State Park

Anthony Galluscio Crooked River State Park Camping Review

This review covers our camping trip to Crooked River State Park for our 25th wedding anniversary. Bobby and Kathleen were able be drive over from Gainesville and have dinner with us.  Being August, it was very hot but we made the most of it and had fun. The kids made us this wonderful campsite marker for our anniversary:
Galluscio Campsite Marker Crooked River State Park
Galluscio Campsite Marker
  • Campground: Crooked River State Park

  • Nights Camping: 3 (August 16 to 19, 2017)

  • Nearest City:  St. Marys, GA

  • Space Number:  45

  • Hookups:  Water/Electric/No Sewer

  • Cost per Night:  $32

  • Likes:  Well maintained state park. Nicely laid out with very private spots, wide roads, and easy access. Very clean and quiet. Beautiful sunsets over the river. Staff is very friendly.

  • Dislikes: There are a lot of pine trees with tree sap so be careful.

  • Notes: This is right across the border from Florida. We went in August and it was HOT, but it was hot everywhere at that time.

  • Rating:  Good

  • Link: http://gastateparks.org/CrookedRiver

Anthony Galluscio Camping Review #3: Vogel State Park

Anthony Galluscio Vogel State Park Camping Review

This review covers our most recent camping trip to Vogel State Park.
  • Campground: Vogel State Park

  • Nights Camping: 5 (July 8 to 13, 2017)

  • Nearest City:  Blairsville, GA

  • Space Number:  34

  • Hookups:  Water/Electric/No Sewer

  • Cost per Night:  $32

  • Likes:  Our spot was very private and next to a babbling creek. There were very few bugs and infrequent rain. The temperatures were in the 70s and 80s during the day and down in the 60s at night. Very clean with campsites well maintained. Absolutely stunning scenery!

    Vogel Camp Site
    Vogel Camp Site
  • Dislikes:  First-come-first-serve check in process is not really fair to out-of-state campers with no local knowledge. The dump stations are not very sanitary because there are constant puddles around the drains and the hoses are not elevated off the ground.

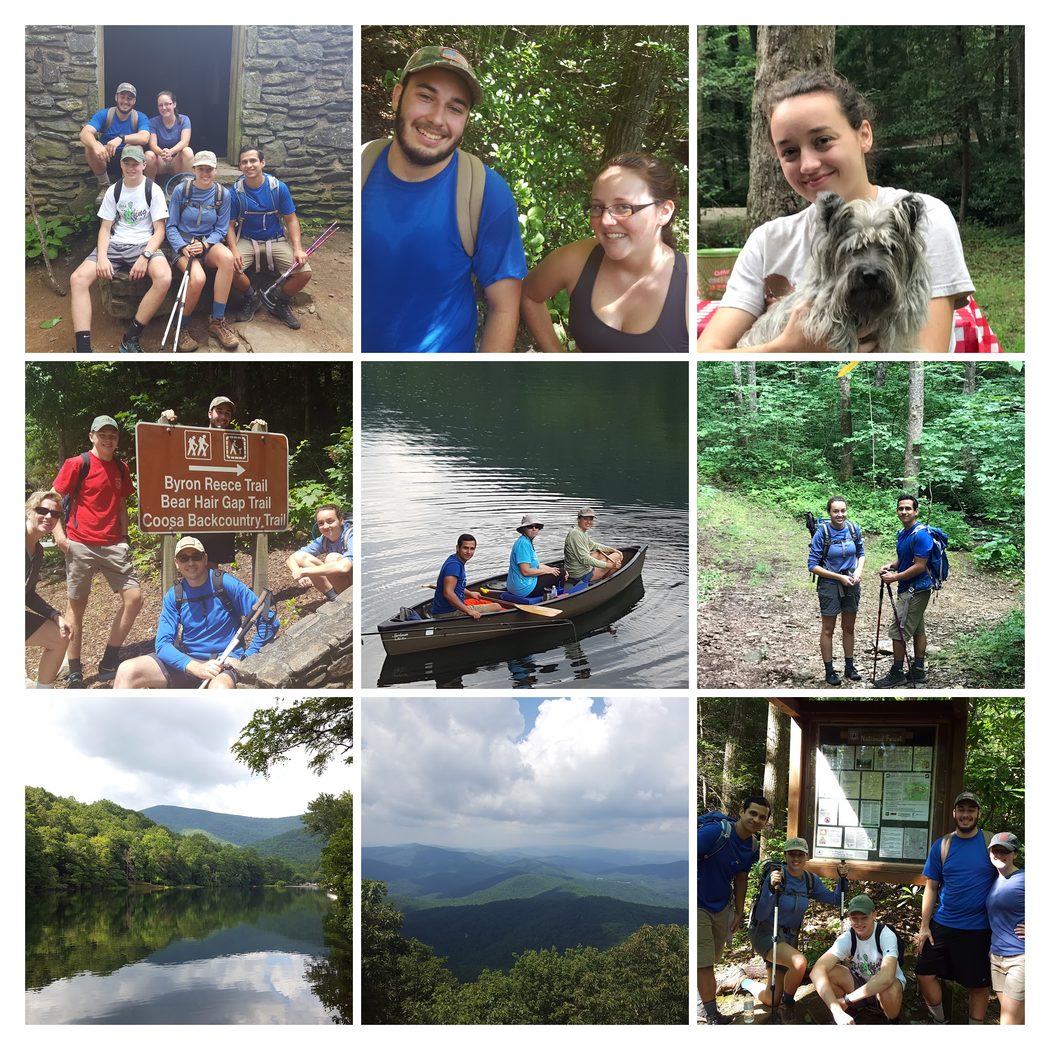
  • Notes:  There is a big lake for canoeing and fishing. The hike around the lake is about one mile. There are many wonderful excursions accessible directly from Vogel State Park including the Byron Herbert Reece Nature Trail, The Bear Hair Gap Trail, and the hike to the top of Blood Mountain on the Appalachian Trail. Within a short drive there is Helton Creek Falls. Blairsville, GA is a nice little town with places to eat. Bobby and Kathleen, Katie and Miguel, and Charlie all joined us for this vacation (Stevie was working). Kourtney, Tyler, and Ansleigh (our neice, nephew, and great neice) came to see us from Clemson one afternoon. We had a blast!

  • Rating:  Excellent

  • Link: http://gastateparks.org/Vogel

Anthony Galluscio Annual Camper Maintenance 2017

Anthony Galluscio Camper Maintenance

My son, Bobby, and I decided that we would take it upon ourselves to perform all the required maintenance on our 2015 Jayco Jay Flight 23RB Travel Trailer. We had difficulty finding a high-quality list of items to check so we surveyed the systems on the camper and developed our own list. It is my hope that we can help other camper owners finding themselves in a similar situation, and even add to this list next year based on comments and feedback received. Here are some stats on our camper:
  • Years Owned: 2 years
  • Total Mileage: 4876 miles
  • Total Nights Camping: 79 Nights Camping
For the record, here is a list of all of the systems on which we performed preventative maintenance:
System Tasks Notes

Hitch

Configured backup assist The backup assist on the F150 is useless. However, I really like the configurable blind spot detection
Removed Gear Rust Used wire brush and Rustoleum rust reformer
Lubricated ball and sway connectors Used standard grease.

Propane

 Inspect  Hoses, connectors, and tanks in good repair
 Clean  Wiped down tanks, hoses, and fittings
 Refill  Took tanks to ACE Hardware and had them "topped off" for $14.

Undercarriage

 Inspect  Noticed some rust starting. That will need to be removed and painted next year.

Roof

 Inspect Seams  Notices small holes and cracks starting in the seals. Will need to repair with Eternabond tape in the near future and definitely by next year.
 Repair issues  Sealed all issues with DAP Clear. Also sealed down seam in front of camper. Used a full 10" tube of DAP.

Stabilizers

 Inspect  Some rust developing on stabilizers that will need to be dealt with in the future. Stabilizers will be difficult to disassemble.  Considering replacing when these become unserviceable.
 Lubricate  Sprayed liberally with silicone lubricant.

Steps

Paint  Painted rusted areas with Rustoleum Rust Reformer.
 Lubricate hinges  Sprayed hinges with silicone lubricant.

Fresh Water

 Sanitize  Followed recommended procedure to drain, sanitized, flush, and refill the fresh water system. I may write a separate blog detailing that process.

Septic system

Clean tank Poured iced in tank before pulling camper to campground. Used internal sprinker system until tank ran completely clear.  Sanitized tank using standard process.
Sanitize gear Wiped down all gear (hoses, fittings, storage box) with Clorox wipes

Hot Water (Gas)

Test striker Lit and ran hot water heater on gas
Clean Cleaned using vacuum and compressed air

Refrigerator (Gas)

Test striker Lit and ran refrigerator on gas
Clean Cleaned using vacuum and compressed air

Stove (Gas)

Test striker Lit and ran stove on gas

Air Conditioner

Clean filter Cleaned filter. Bobby disassembled the unit on the roof and we could find no other filters. Unit running well.

Awning

Clean Sprayed with Simple Green to kill mildew
Inspect Some rust on screw heads, etc.
Lubricate Sprayed liberally all joints and moving parts with silicone lubricant.

Wheels

Inspect Inspected rubber, hubs, and suspension. No issues.
Grease hubs Dexter EZ-Lube hubs were easy to re-grease by following instructions on YouTube.

Anthony Galluscio Camping Review #2: Paynes Praire

Anthony Galluscio Paynes Prairie Camping Review

This review covers our most recent camping trip to Paynes Prairie.
  • Campground: Paynes Prairie

  • Nights Camping: 5

  • Nearest City:  Gainesville, FL

  • Space Number:  46

  • Hookups:  Water/Electric/No Sewer

  • Cost per Night:  $23

  • Likes:  Our spot was very secluded. We experienced virtually no bugs. Weather and temperature could not have been better. Lots of dogs for Sophie to meet.  Very clean with campsites well maintained. Courteous campers. Weather was beautiful. Clear and cool.

  • Dislikes:  Space 46 is difficult to back into. The water hose at the pump out station was not working so I could not run the internal black tank sprinkler. Also, the camp ground needs to arrange to have the recycling picked up more often.

  • Notes:  Becca and I camped here in our Jayco Jay Flight 23RB  travel trailer. We brought our Cairn Terrier, Sophie with us.  Even though the spot was difficult to back into, I would choose it again due to the seclusion. The "kids" came down from Gainesville and we had a great time.

  • Rating:  Excellent

  • Link: https://goo.gl/xmDdpm

Anthony Galluscio Camping Review #1: Long Point

Anthony Galluscio Long Point Camping Review

  • Campground: Long Point
  • Nights Camping: 2
  • Nearest City: Sebastian, FL
  • Space Number: L110
  • Hookups: Water/Electric/No Sewer
  • Cost per Night: $31
  • Likes: Nice and helpful staff. Clean. Courteous campers. Weather was beautiful. Clear and cool. No bugs.
  • Dislikes: Utility pedestal was on the wrong side so we had to use extensions. Also, this particular space was very narrow.
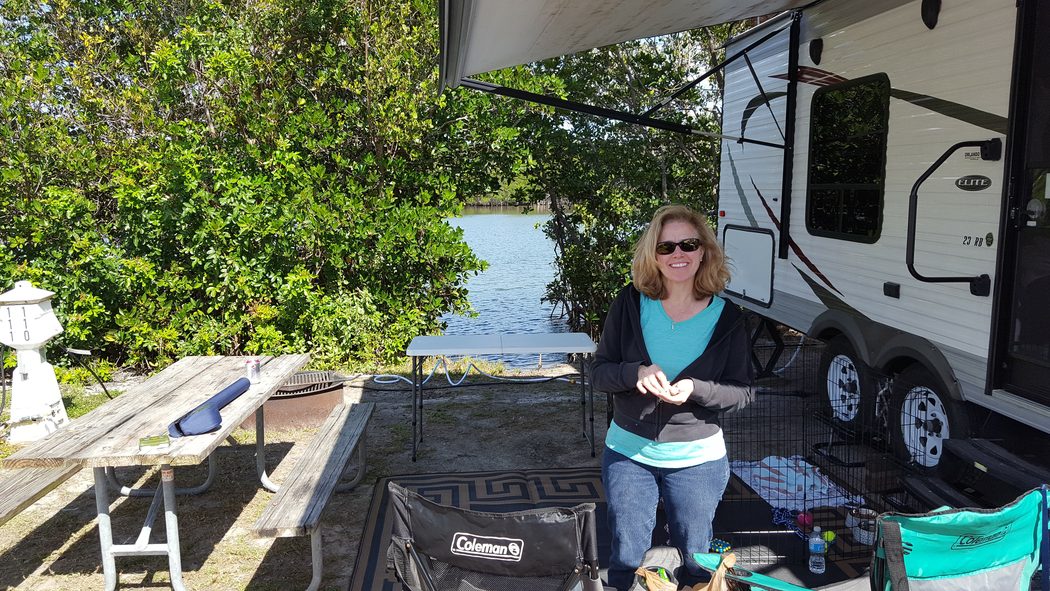
  • Notes:  Becca and I camped here in our Jayco Jay Flight 23RB  travel trailer. We brought our Cairn Terrier, Sophie with us. We hiked Scout Island and had a great time. I purchased a 50 ft 30 amp extension and a 50 ft hose extension from the Long Point store for $70. That was better than making the 1.5 hr round trip to Walmart on the mainland. Funny thing that my GPS showed Walmart as only three miles away, but you would have to swim to get there!
  • Rating:  Excellent
  • Link: https://goo.gl/urbNoM